Migrate ZIL from a Legacy account to Zilliqa EVM

If you hold ZIL in a Legacy (zil1...) account, the ZKP Migration App provides a way to move that balance to a Zilliqa EVM (0x...) account you control. This guide explains where to get the app and what to expect at each stage.
Read this guide before starting. The process involves your wallet recovery phrase and a transfer of funds. Check every address carefully and use only the official links below. Zilliqa will never ask you to send your recovery phrase to anyone or enter it into a Google Form.
Download and install the app
Get the app from Zilliqa’s official GitHub releases page. The download is named zkp-migration-app-linux-amd64.tar.gz.
macOS users should download the app from following GitHub release page: https://github.com/Zilliqa/zkp_recovery_app/releases/download/v0.6.0/Zero.Knowledge.Migration.App.zip
The app runs directly on 64-bit Linux. On Windows, it runs through Ubuntu using Windows Subsystem for Linux (WSL). There is no separate Windows download.
Follow the guide for your computer:
Before opening the app, compare your download’s SHA-256 checksum with the value published for the release, as described in the Linux guide. Windows users should perform this check too. If the values do not match, do not open the app.
Step 1 - Legacy Account Migration Notice
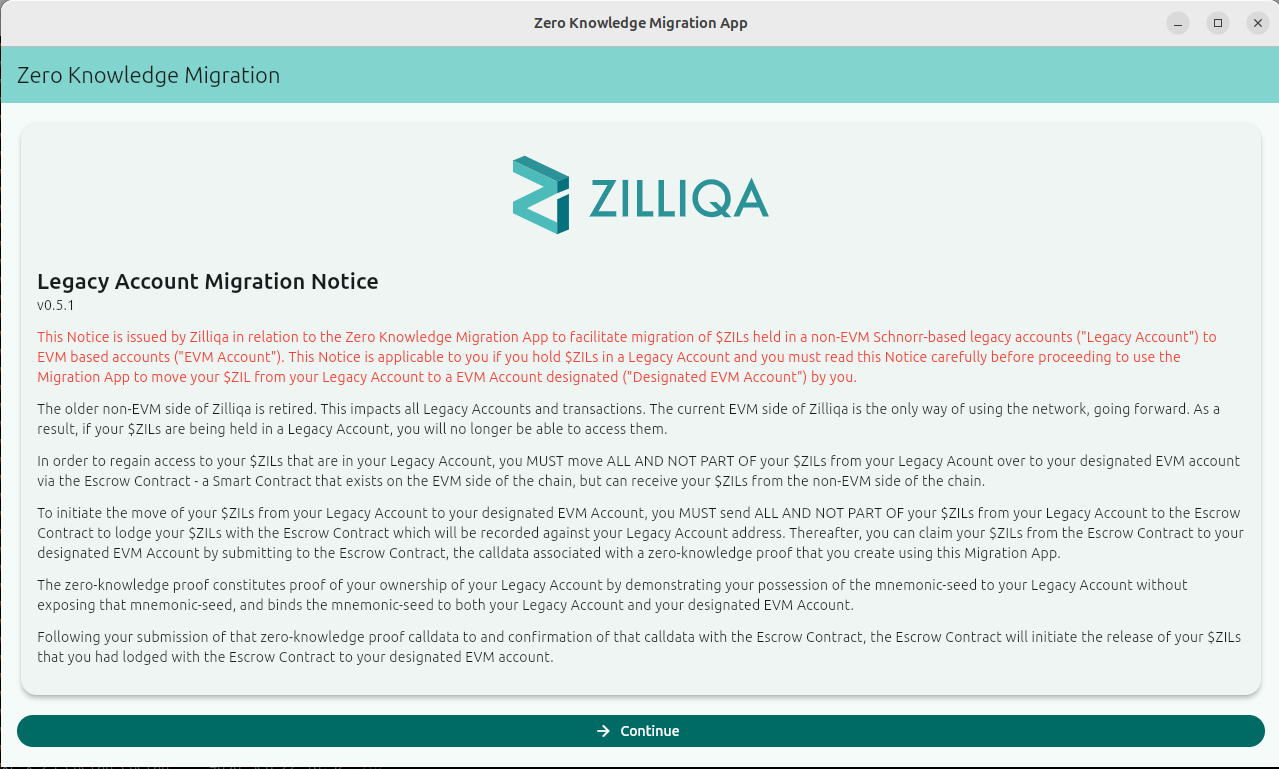
When you open the app, you'll see the Legacy Account Migration Notice. It explains what this app does in plain terms: please read it before you do anything. Click Continue once you've read it.
Step 2 - Downloading the circuit key file
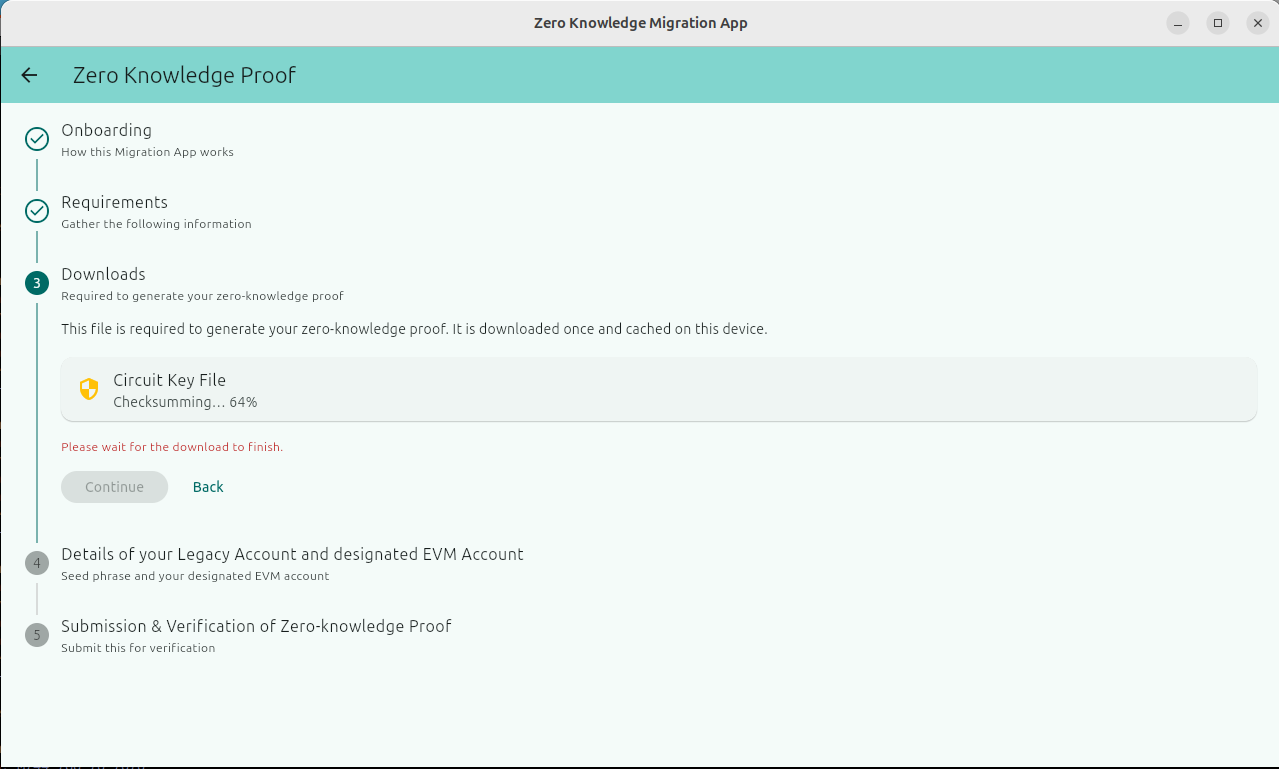
The app needs a Circuit Key File to generate your zero-knowledge proof. This downloads once and is cached on your device - you won't need to download it again on future runs. Wait for it to finish; you'll see a checksum-verification progress bar.
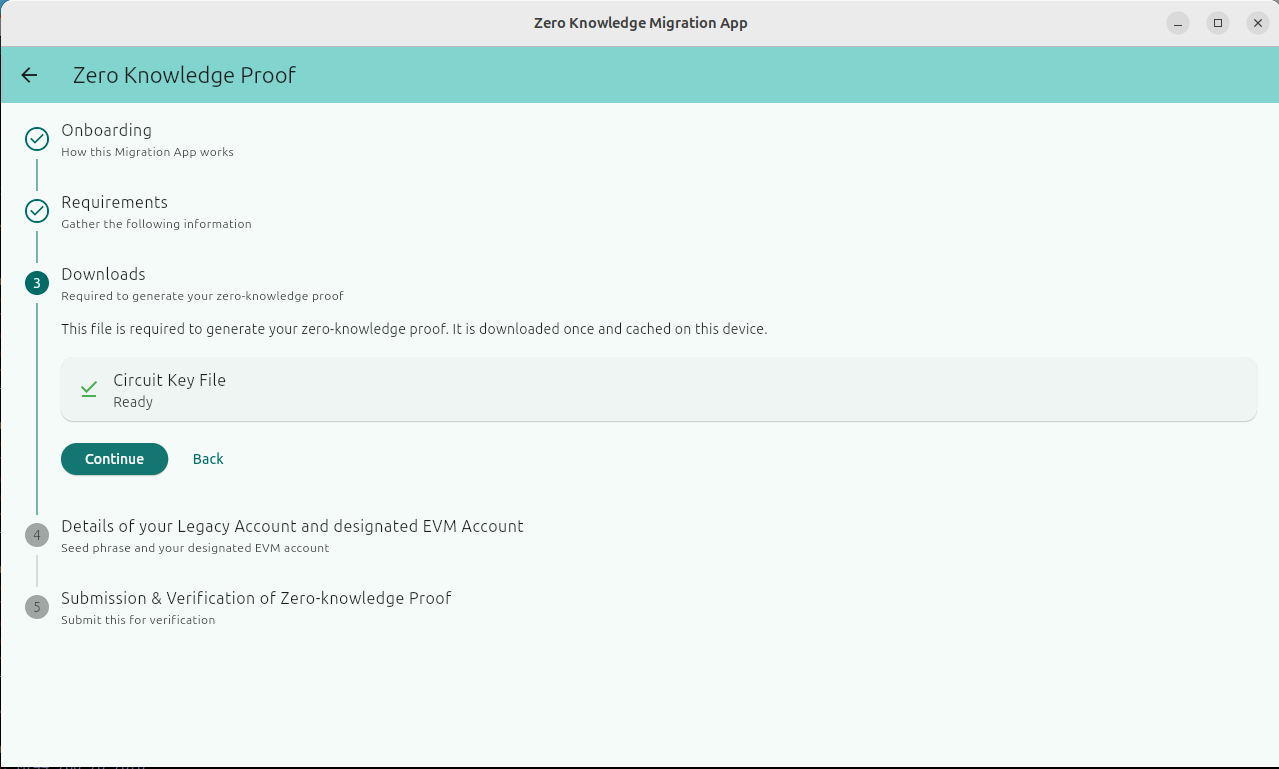
Once it shows Ready with a green checkmark, click Continue.
Step 3 - Enter your account details
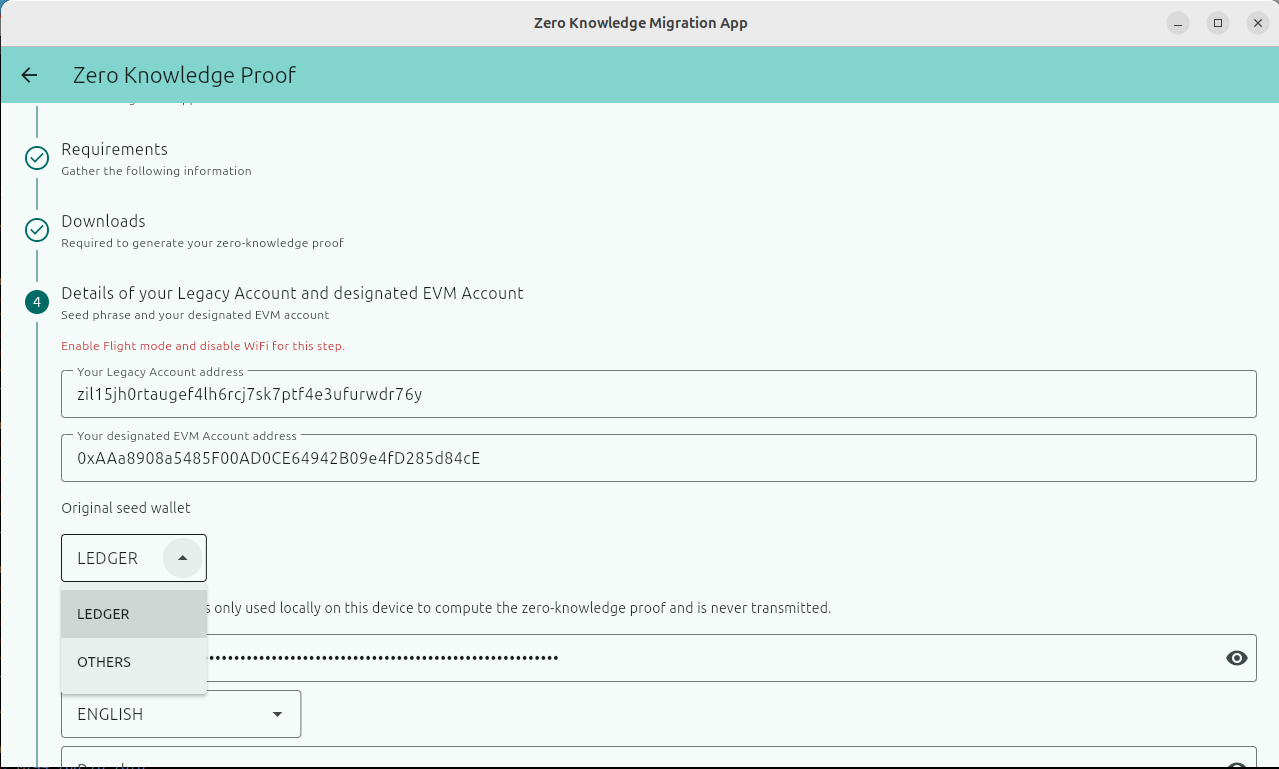
This is the important step. You'll enter:
- Your Legacy Account address - your old
zil1...address. - Your designated EVM Account address - the
0x...address you want your ZIL moved to. Double-check this carefully; this is where your funds will migrate to. - Original seed wallet - choose LEDGER if your legacy wallet was a Ledger hardware wallet, or OTHERS for a standard software wallets. This determines which derivation path the app uses to recover your account from your seed phrase - picking the wrong one means the app won't find your account.
⚠️ The app itself displays a warning at this step: "Enable Flight mode and disable WIFI for this step." You're about to enter your mnemonic seed phrase - the app wants you offline while it's in memory.
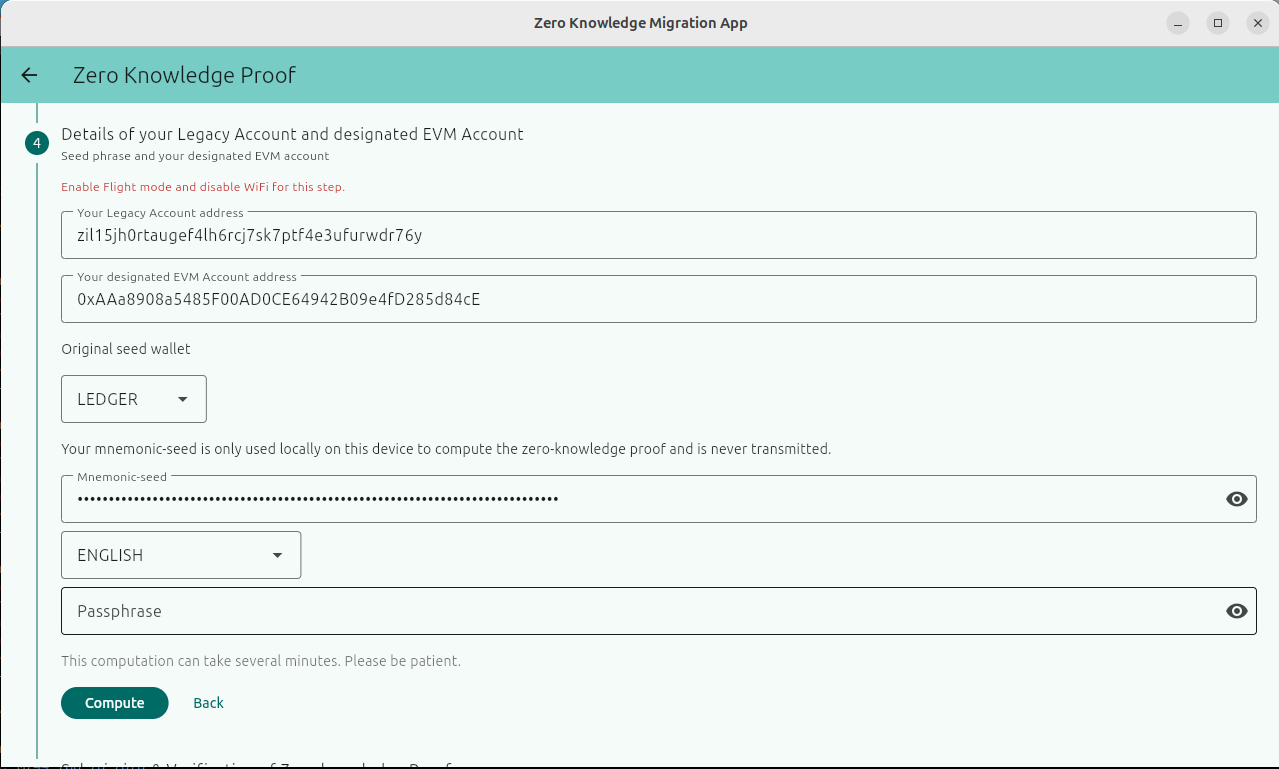
Fill in your Mnemonic-seed, select the correct Language, then click Compute. The Passphrase field is optional - only fill it in if you originally set one on your wallet; leave it blank otherwise.
Step 4 - Computing the proof
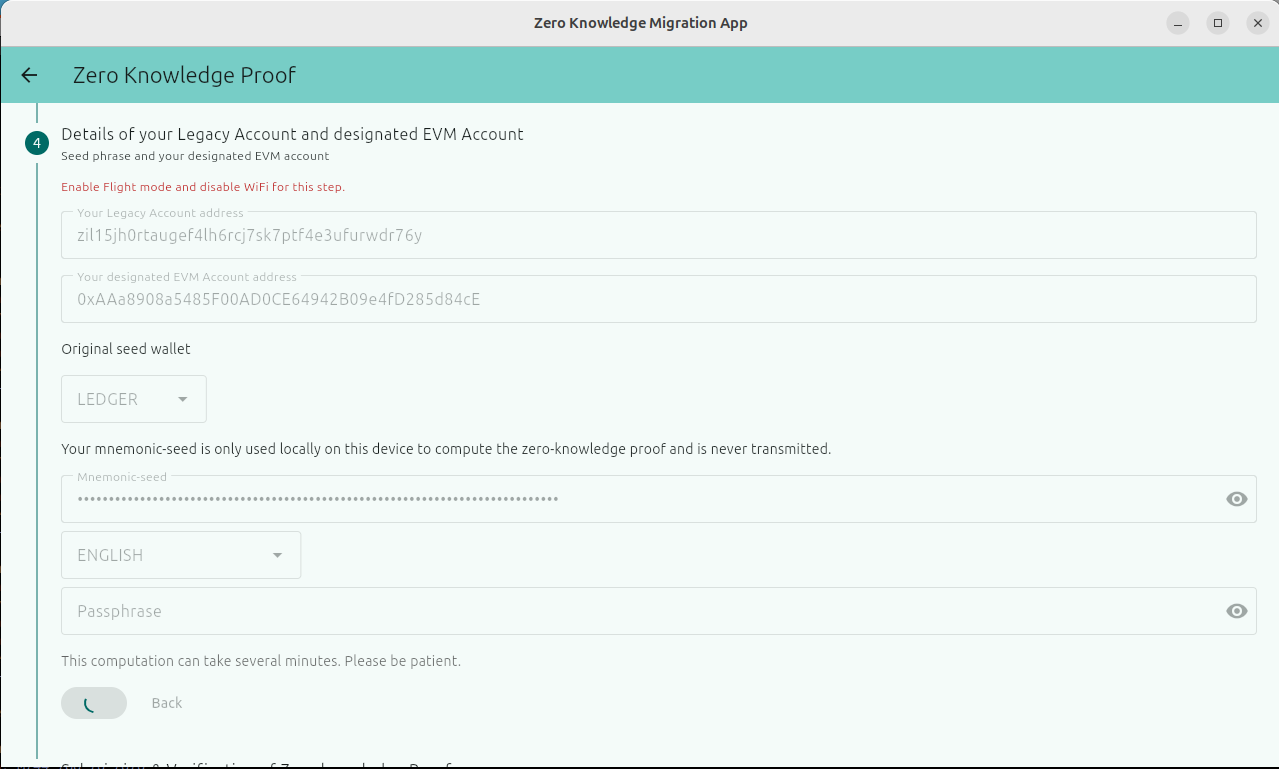
The app now computes your zero-knowledge proof locally, on your device. Your seed phrase never leaves your machine - the app only ever generates the resulting proof, not your seed. The notice itself says this can take several minutes - be patient and don't close the app.
Step 5 - Submission & Verification
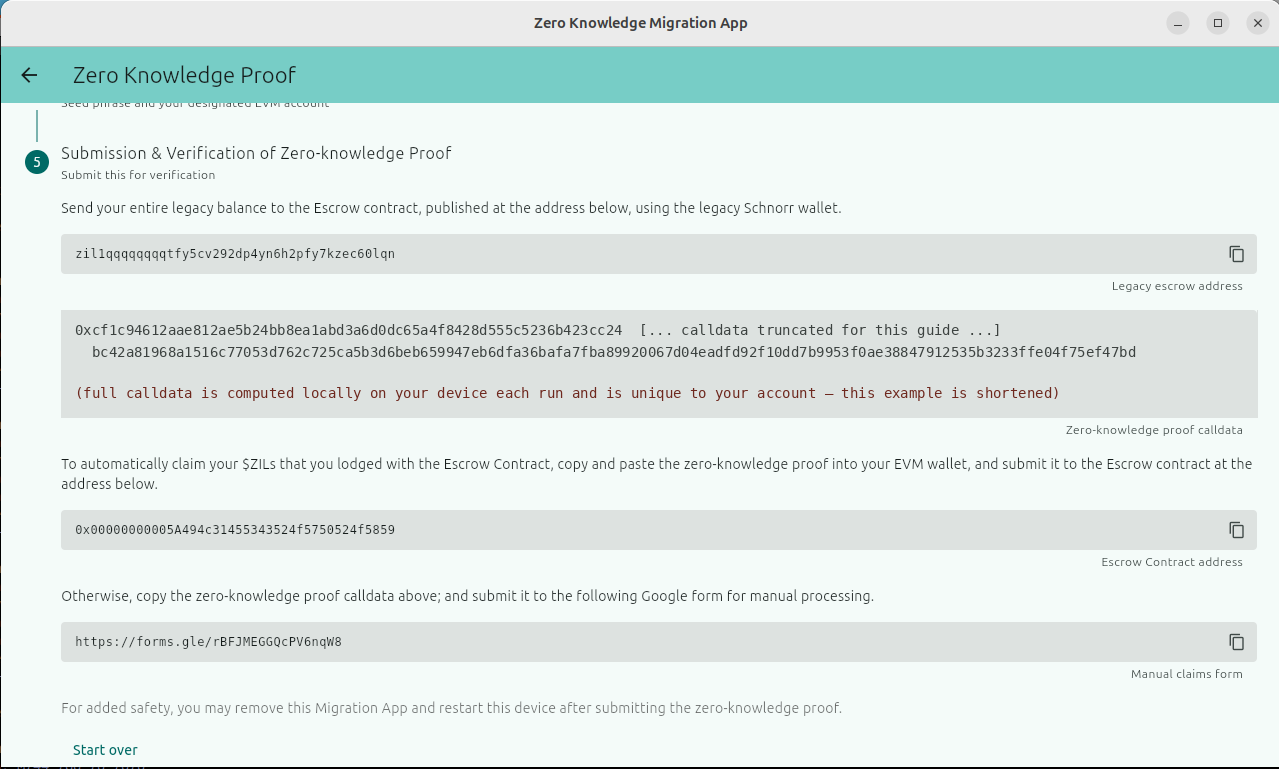
Once computed, you get everything you need to actually complete the migration:
- Send your wallet's ZIL balance to the Escrow Contract's legacy (
zil1...) address shown on screen, from your legacy Schnorr wallet. Make sure you leave around 0.5 ZIL behind to cover gas fee. - Copy the zero-knowledge proof calldata shown (a long hex string) - this is what proves your ownership and claims your funds to your designated EVM account.
- Submit that calldata one of two ways:
- Let us submit it for you (free, no ZIL needed): don't have any ZIL to cover gas, or just don't want to deal with it?
Copy the calldata and submit it via the Google Form link shown on screen instead - it's free, and completely safe. The calldata only contains your zero-knowledge proof, it never includes your private key, seed phrase, or any other sensitive information. We'll process it for you within 24 hours during business hours. - Submit it yourself (instant but small gas fee): if your wallet lets you send a transaction with raw hex data (MetaMask, Rabby, and most desktop browser-extension wallets do), send a 0-value transaction to the Escrow Contract address shown, with the calldata pasted into the "Hex Data"/ "Data"/ "Input Data" field on the send screen. This needs a small amount of ZIL in that EVM wallet to cover gas (typically well under 2 ZIL). Your funds are released as soon as your transaction confirms.
- Let us submit it for you (free, no ZIL needed): don't have any ZIL to cover gas, or just don't want to deal with it?
- For added safety, the app suggests you may remove the Migration App and restart your device after submitting your proof.
What happens next
Once your calldata is submitted and your legacy balance has actually reached the Escrow Contract, your ZIL is released to your designated EVM account automatically - usually within 24 hours if you used the Google Form, immediately if you submitted the transaction yourself directly to the Escrow Contract.
If you need help, use Zilliqa’s official support channels. Never share your recovery phrase, private key, or wallet passphrase with anyone, including someone offering migration support.