How to launch your own token on Zilliqa
Whether you’re looking to get started with smart contract development on Zilliqa or are building a project that needs its own token, you’ve come to the right place.
Whether you’re looking to get started with smart contract development on Zilliqa or are building a project that needs its own token, you’ve come to the right place.
Zilliqa is one of the best platforms upon which to create and launch your own token because of its scalability, high transaction throughput, and low transaction fees.
With EVM compatibility currently being deployed on testnet, it will soon be possible to deploy ERC-20 tokens using Solidity code to the blockchain. For this tutorial, however, we’ll be using Zilliqa’s own ZRC-2 standard to create a token, with no programming knowledge required.
ZRC-2 is Zilliqa’s standard for fungible tokens - tokens that are identical and mutually interchangeable - which offers powerful built-in features. These include:
- Minting/burning tokens
- Transferring tokens from one account to another
- Querying account token balance
- Querying total token balances
- Approving third parties to spend a certain amount of tokens
The ZRC-2 standard makes it possible to create a token with a wide range of purposes that extend beyond the Web3 space. Developers can manage the circulating supply of their tokens according to their dApp or protocol design.
Business owners can integrate tokens as a payment option for their website or service. Content creators and streamers can harness tokens to deepen engagement with their subscribers or fan base.
The best thing about launching your own ZRC-2 token on Zilliqa is that you can do so without any programming or technical background.
Creating and launching your own token on Zilliqa only takes around 10 minutes. We’ve outlined how to launch your own token on the Zilliqa testnet below.
Getting started
Before you begin your journey to launching your token on the Zilliqa testnet, here are a list of things you’ll need to do first:
- Create a ZilPay wallet (if you do not already have one)
- Ensure that your ZilPay wallet is set to “testnet”
[Click the gear symbol on the bottom right >> Networks >> Select “testnet”] - Fill your ZilPay wallet with tokens from a testnet faucet
[Use your ZilPay testnet address indicated at the top of the wallet interface]
Launching your token on testnet first is recommended as it doesn’t require you to spend your actual ZIL. Once you are familiar with the steps involved, you can progress to deploying your token on the Zilliqa mainnet.
Launching your token
Launching your token begins by deploying contract code written in the Scilla smart contract language. You will not need to write your own code, as we can use the pre-written ZRC-2 code supplied here.
Step 1: Copy the contract code
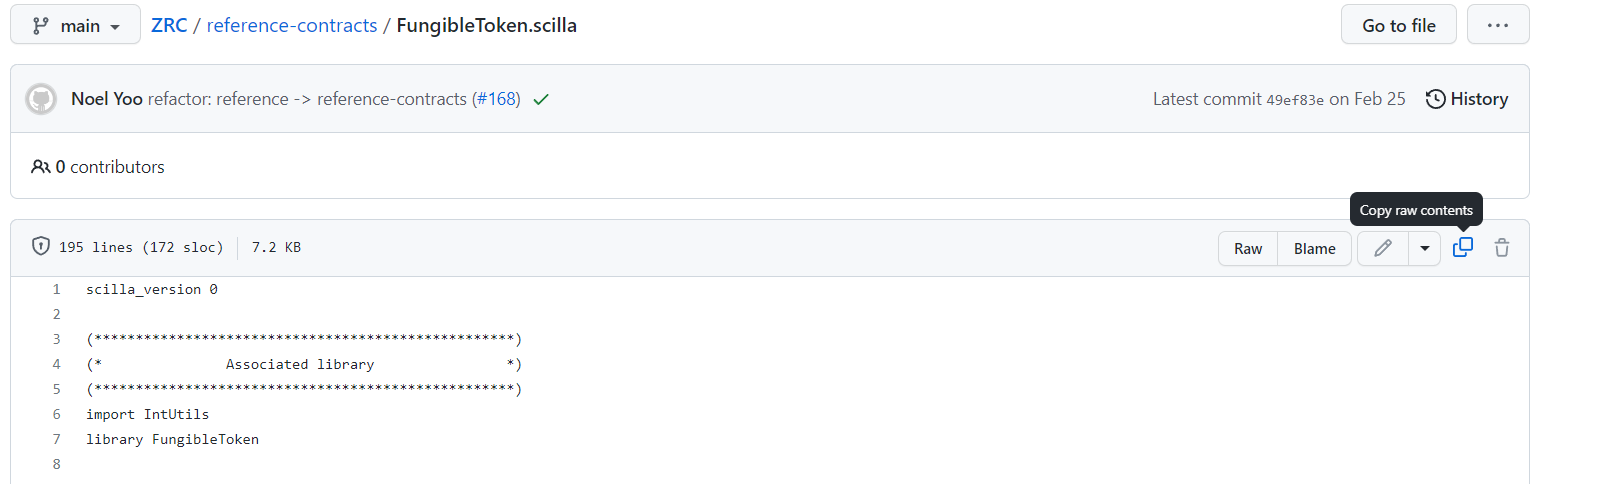
Step 2: Connect your ZilPay wallet to Zilliqa IDE and paste the ZRC-2 code or select the “FungibleToken.scilla” pre-made contract
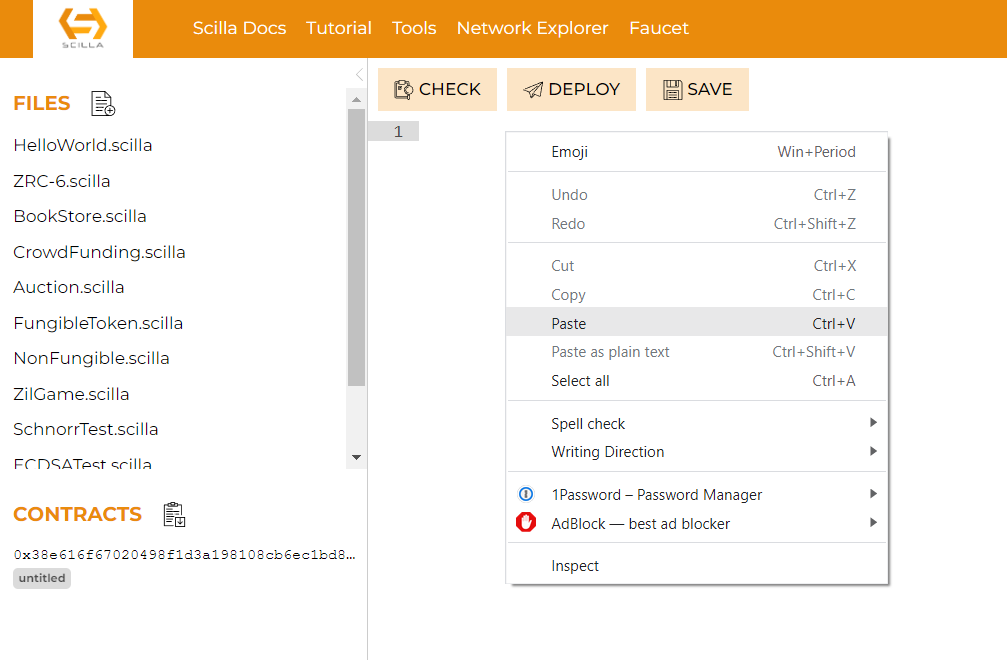
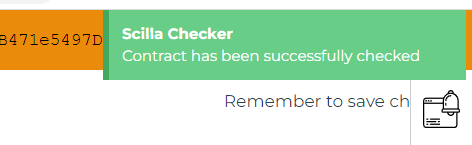
Step 3: Click on Check, then Deploy.
Clicking Check should result in a green notification popping up at the top right of your screen. Once you see this notification, you can proceed to select Deploy.
Step 4: Fill out the parameters on the right side of the screen:
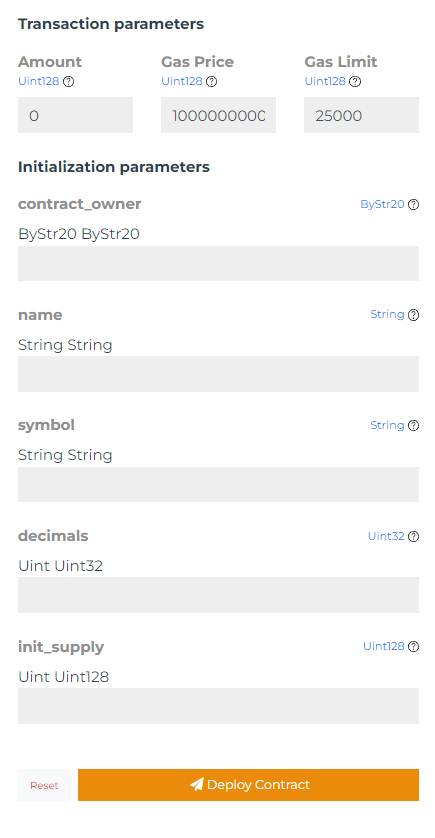
Contract owner:
Insert your wallet address in hash format from the bar above.

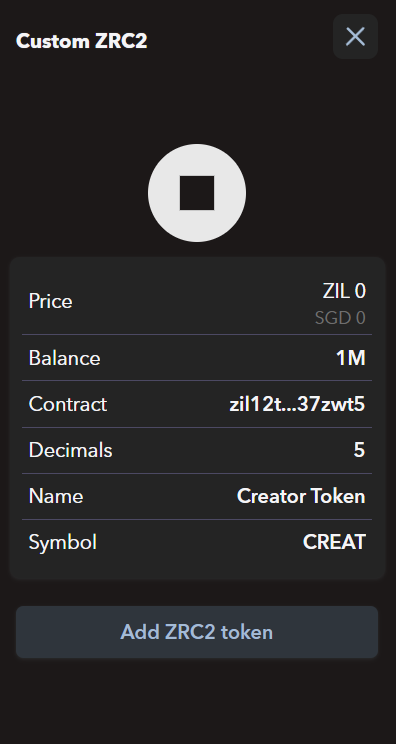
Name:
Input the name of your token. Let’s use “Creator Token” as an example.
Symbol:
The ticker symbol of your token. We’ll use “CREAT” as an example.
Decimals:
The number of zeroes following your token’s initial supply. For example, if you decide to have an initial supply of 1 million tokens with five decimals, it will be denoted as 100000000000. We’ll use five decimal places as an example.
Initial supply:
As mentioned earlier, the number reflected here should correspond with the number of decimal places you’ve set previously. We’ll use 1 million, which will be denoted as 100000000000.
Step 5: Deploy the contract
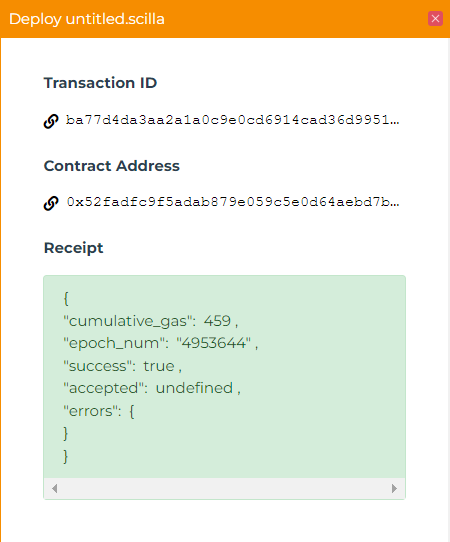
Click on “Deploy Contract”, and confirm the transaction that appears on your screen. You should then see a sign that says “Waiting for transaction to reach the network”.
You will then see a green text field upon the contract’s successful deployment.


Viewing your token on ZilPay
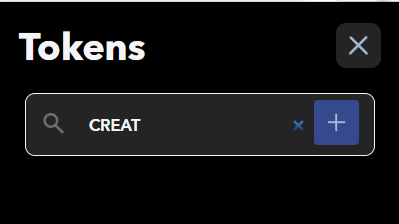
Click on the Contract Address to be redirected to the Devex page of the new token’s contract. Copy the address underneath “Contract”.
In the main screen in your ZilPay wallet, select Manage. Input the ticker of the new contract (CREAT) and paste in the address from above. Then select Fetch. You should see the details of your new token.