How to connect Ledger with Metamask
A Step-by-Step Guide for Ledger Users on how they can connect Ledger with Metamask
Recently, Zilliqa shared a tutorial to help the Zilliqa community transition from the Legacy staking platform to the New staking platform. While many users have successfully staked, we received feedback from Ledger users seeking more clarity—particularly around connecting their Ledger devices with Metamask and ZilPay.
To make this process seamless for everyone, we’ve put together this follow-up guide specifically for Ledger users. This is Part 1 of our tutorial series, where we'll guide you through connecting your Ledger device to Metamask. In Part 2, we'll cover how to connect your Ledger to ZilPay.
Connect Ledger with Metamask
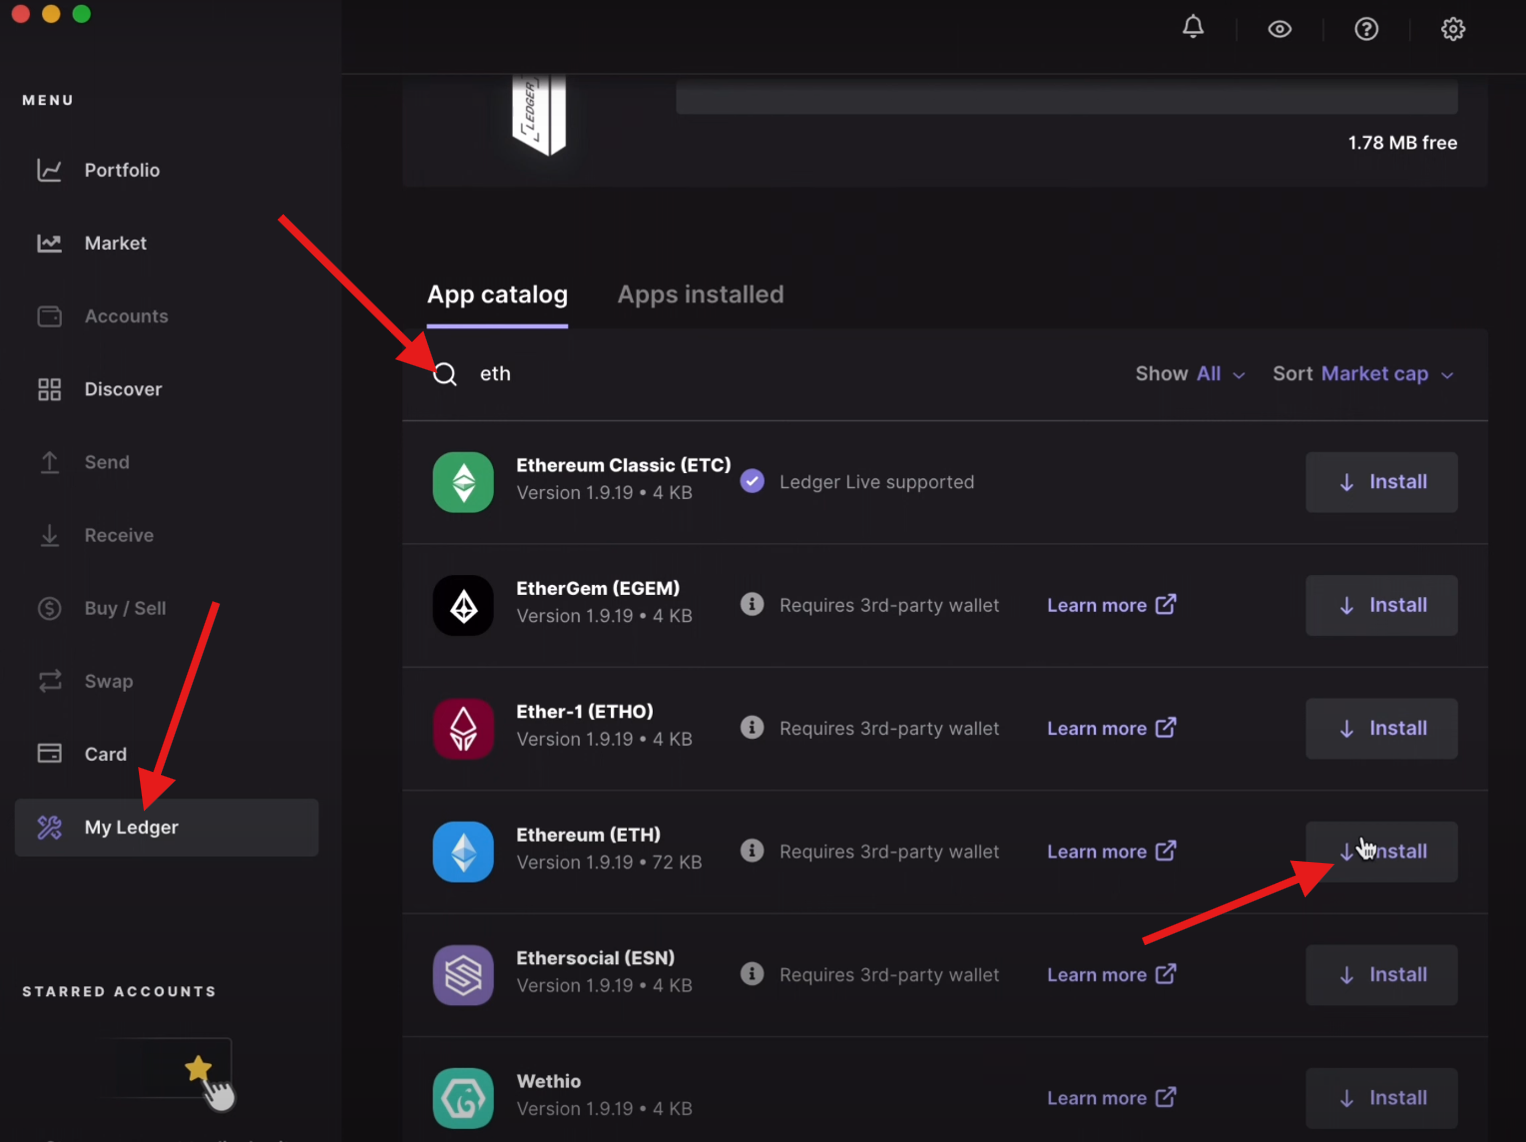
Important: Before you begin, make sure to install the Ethereum app on your Ledger device using the Ledger Live app. Open Ledger Live, go to "My Ledger", search for "Ethereum", and install it.
Follow these steps to set up Metamask and link your Ledger device:
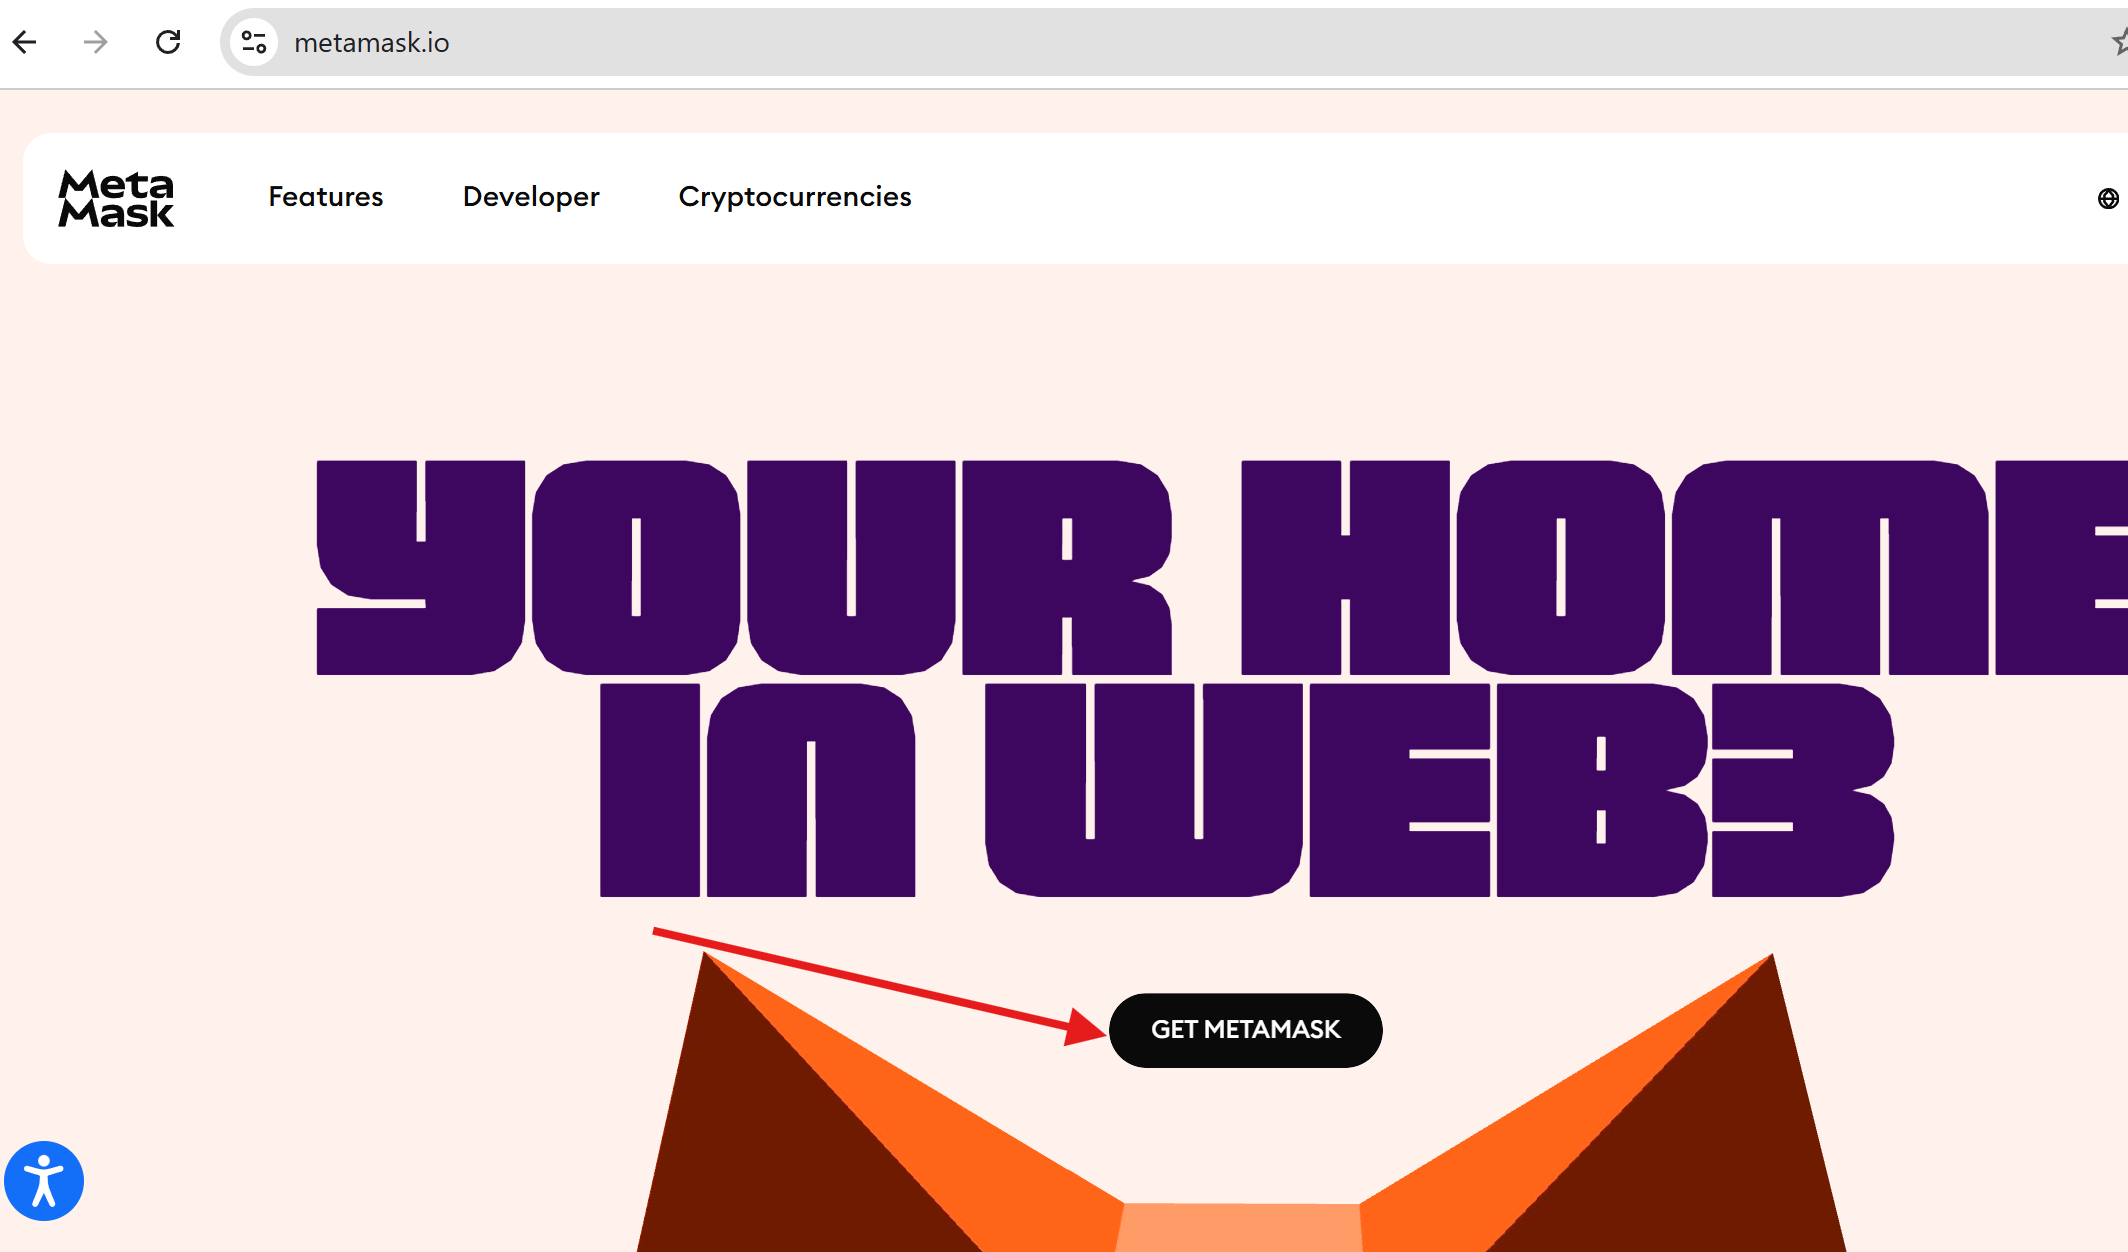
- Visit https://metamask.io and click “Get Metamask”.
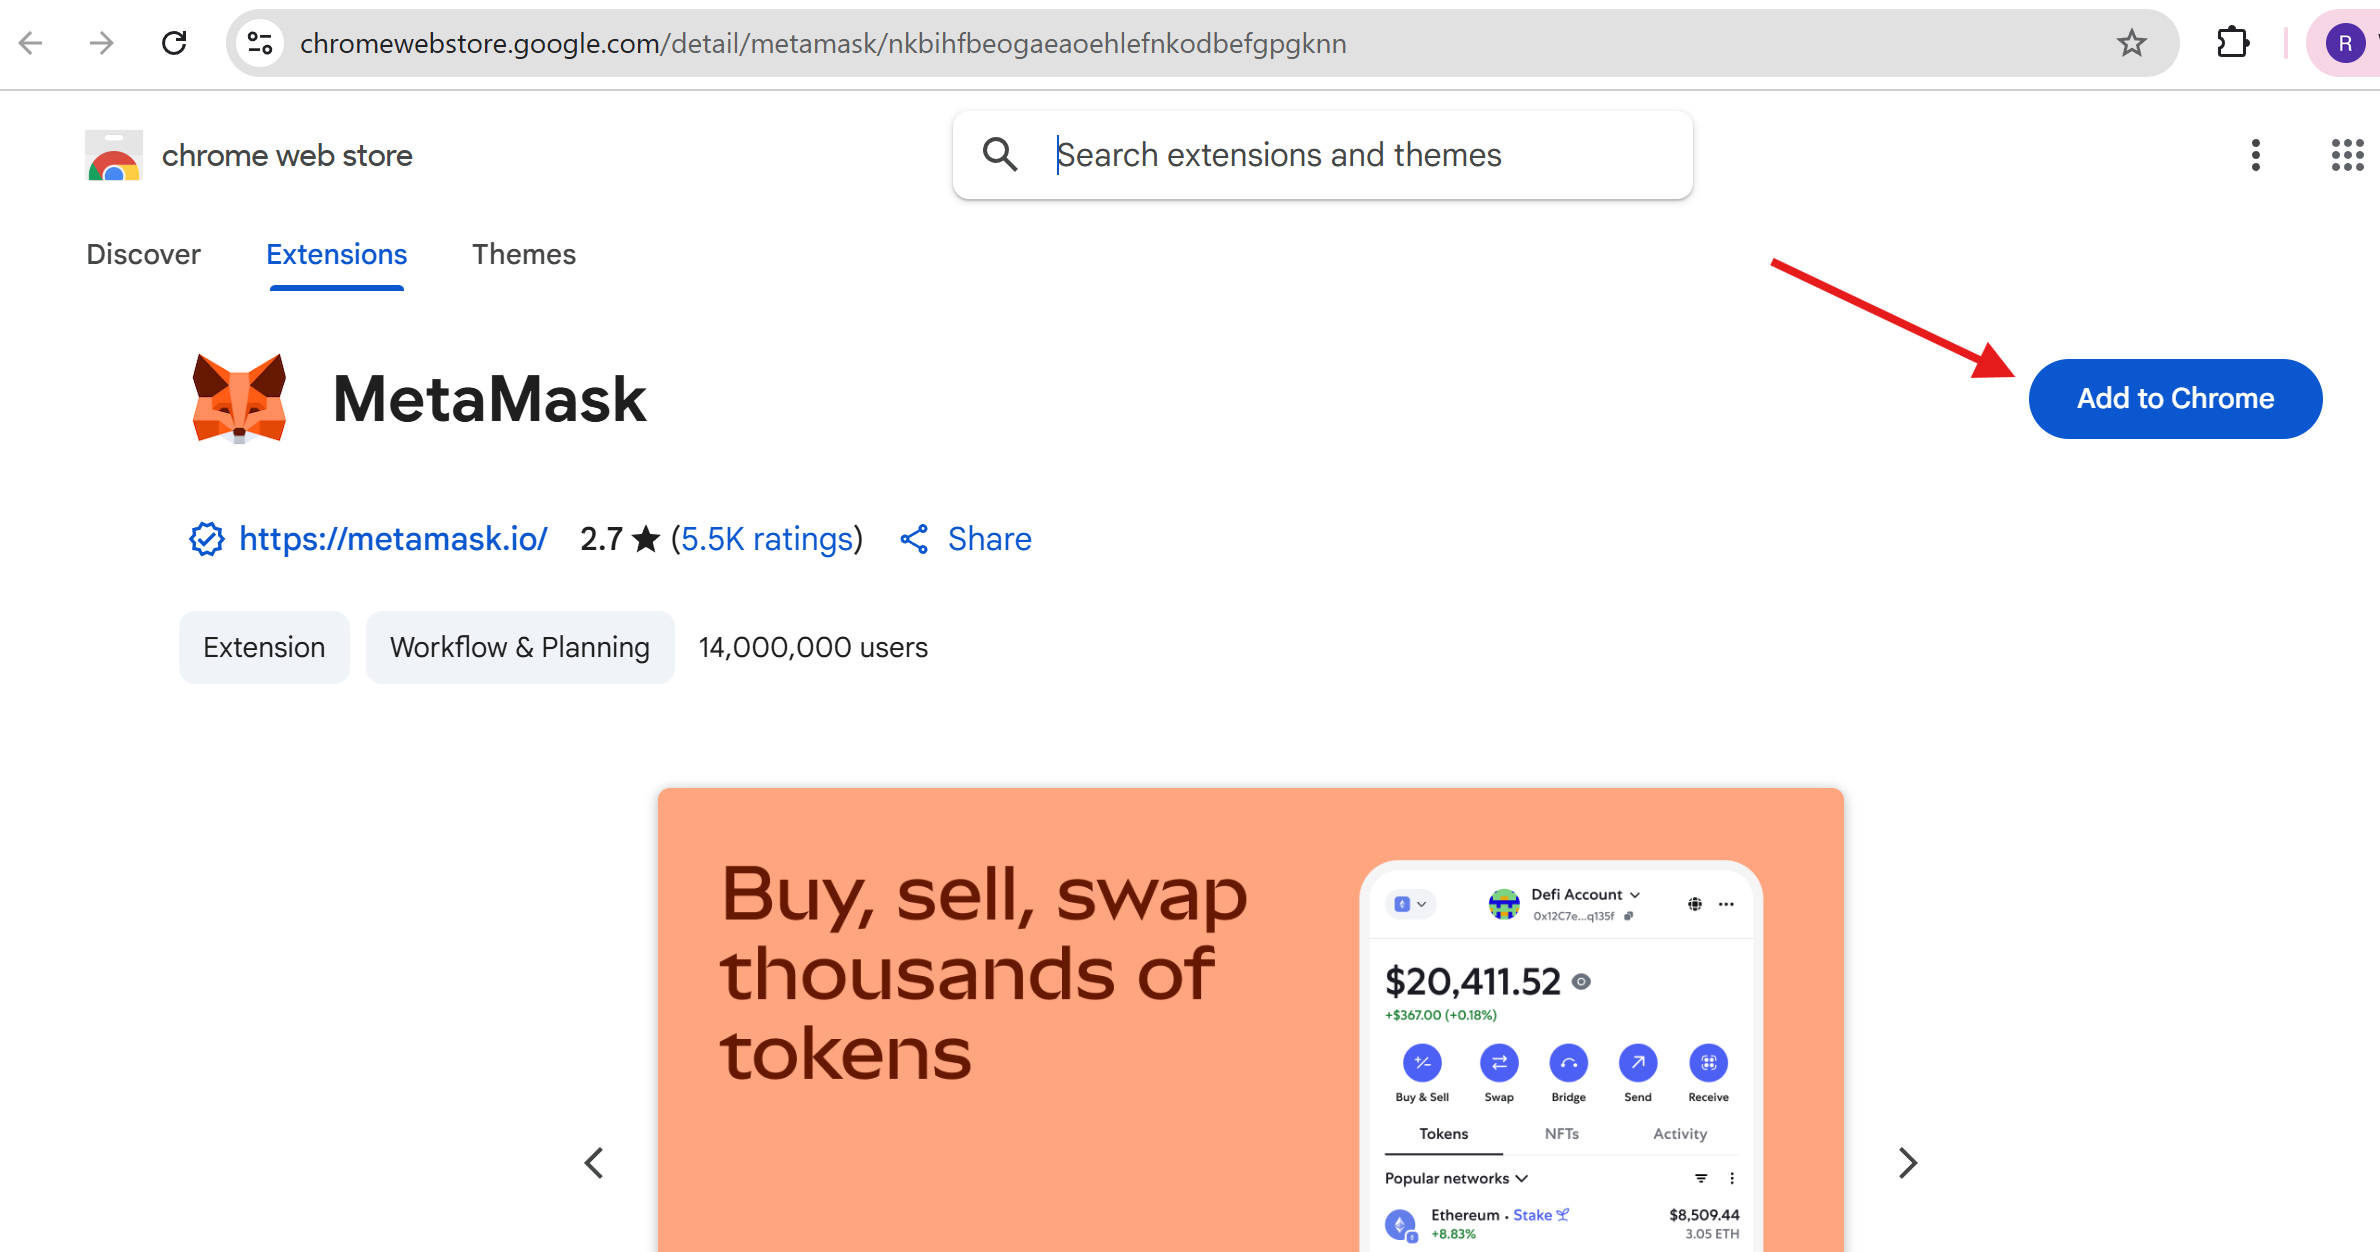
- Click “Add to Chrome”.
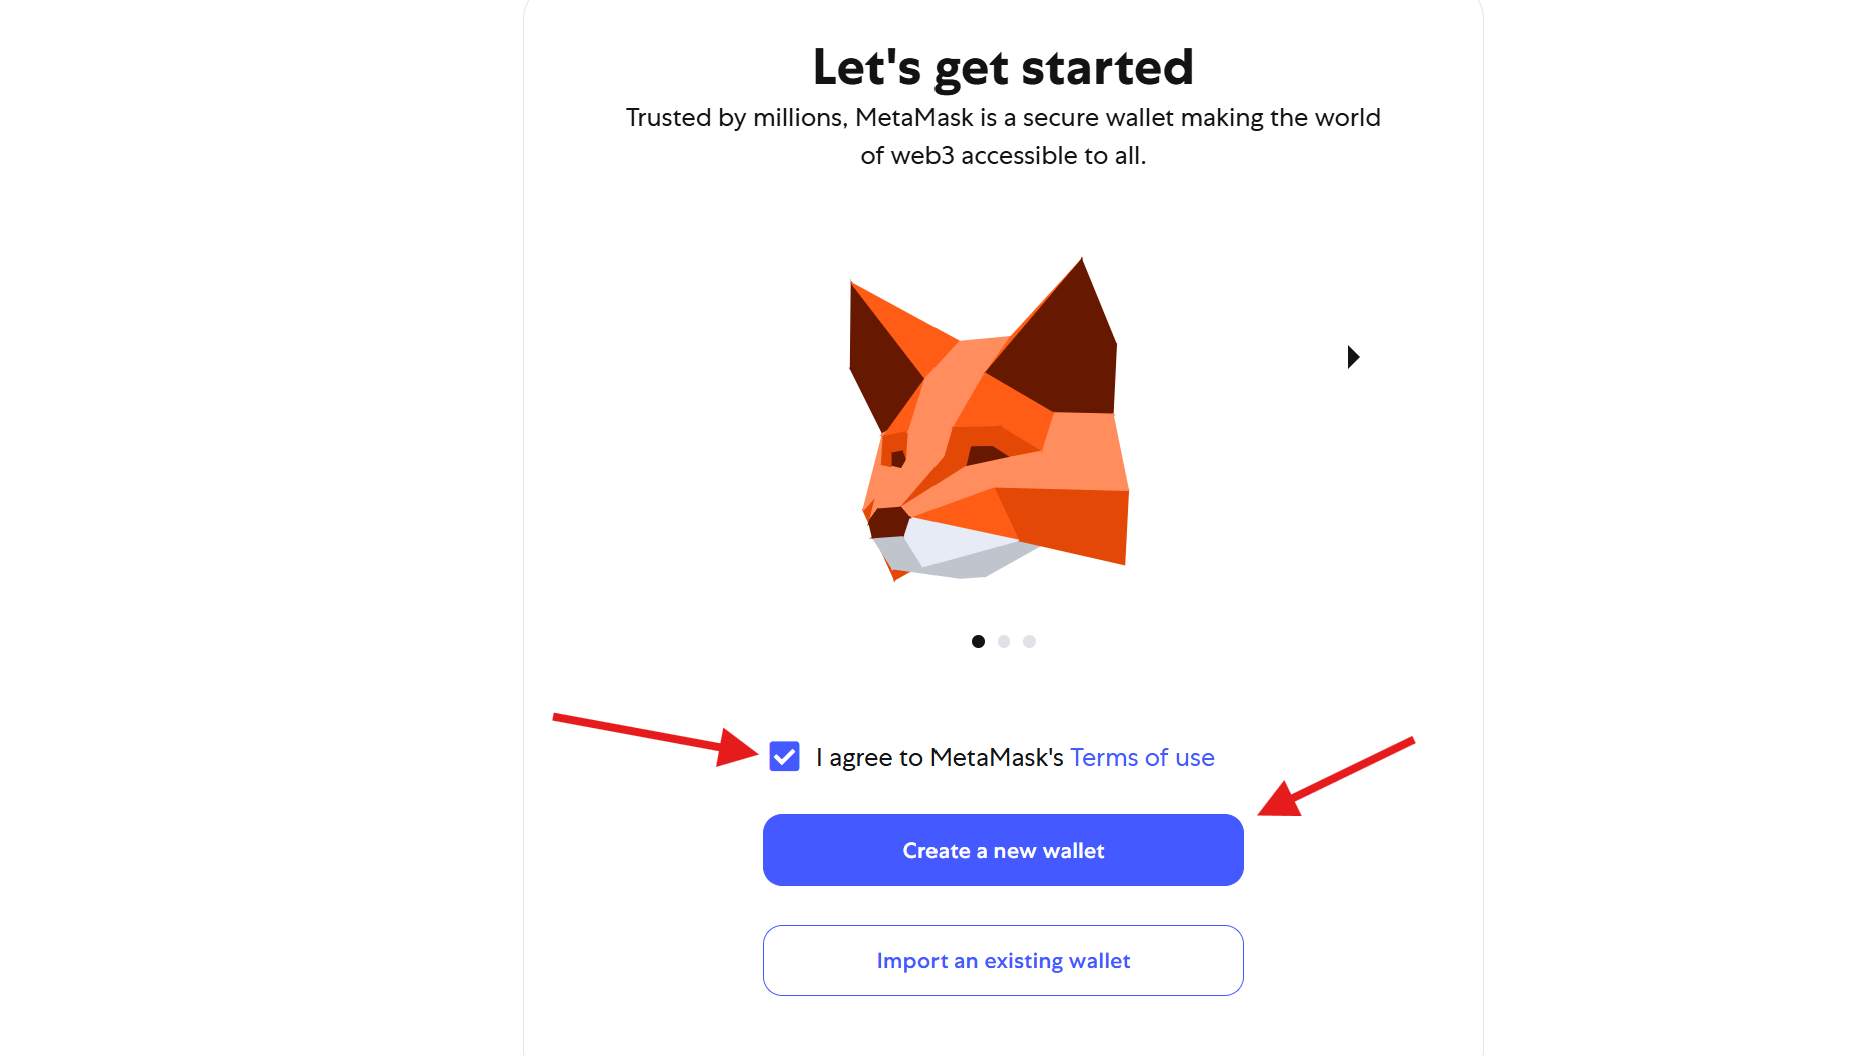
- Agree to the Terms and Conditions, then click “Create a new wallet”.
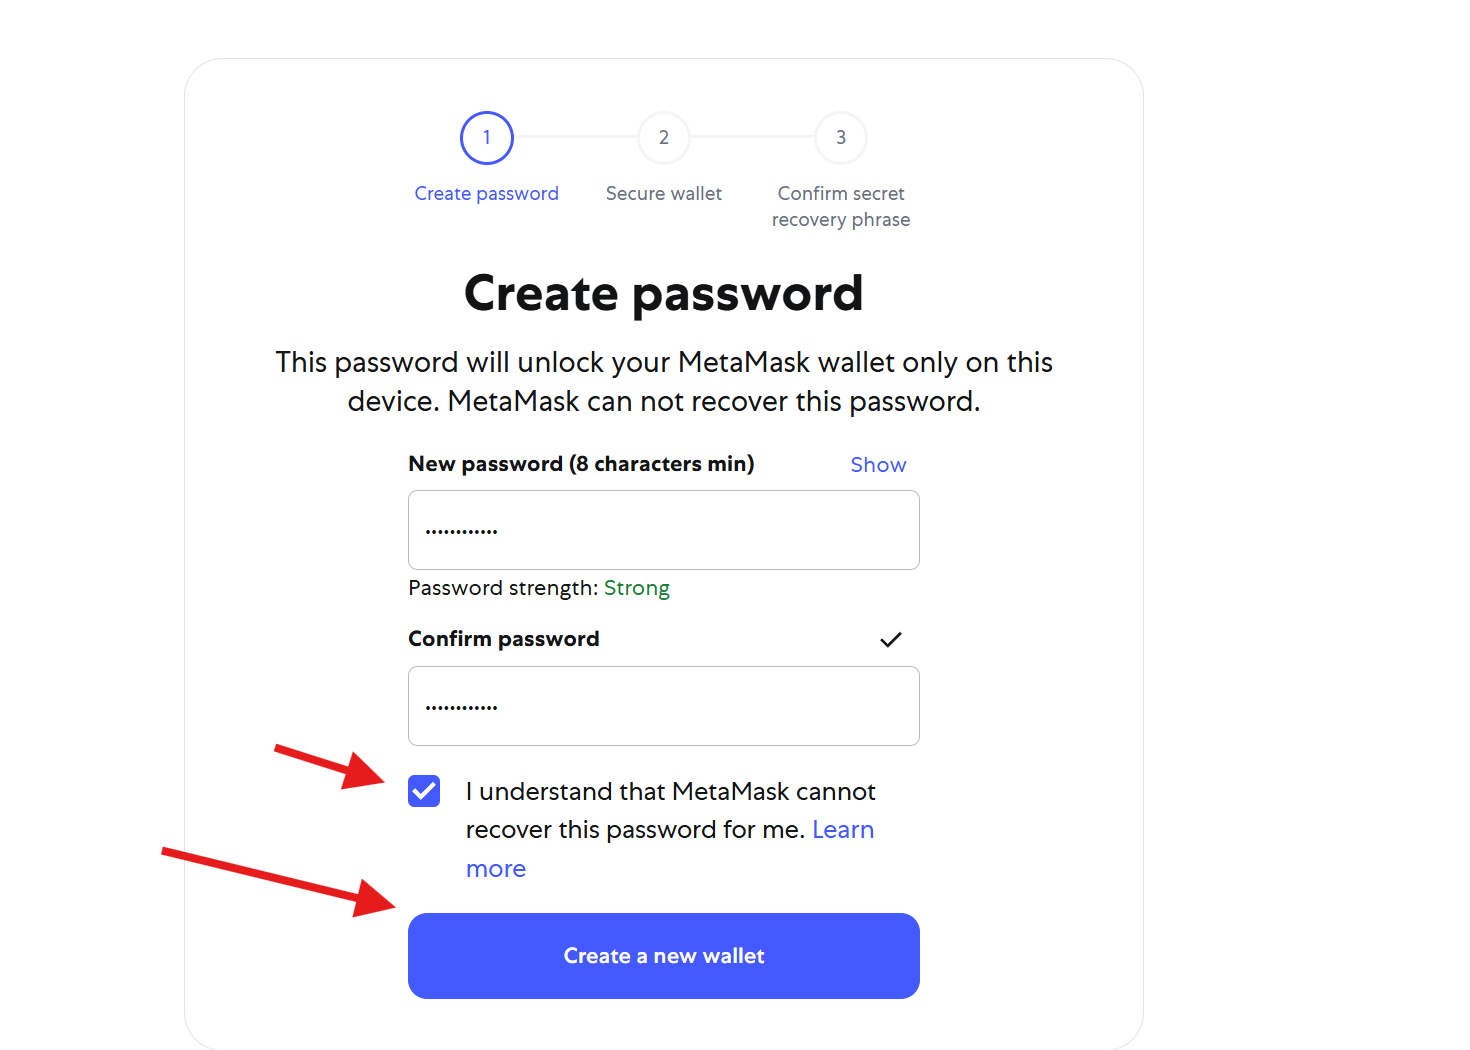
- Set password and confirm by clicking “Create a new wallet” again.
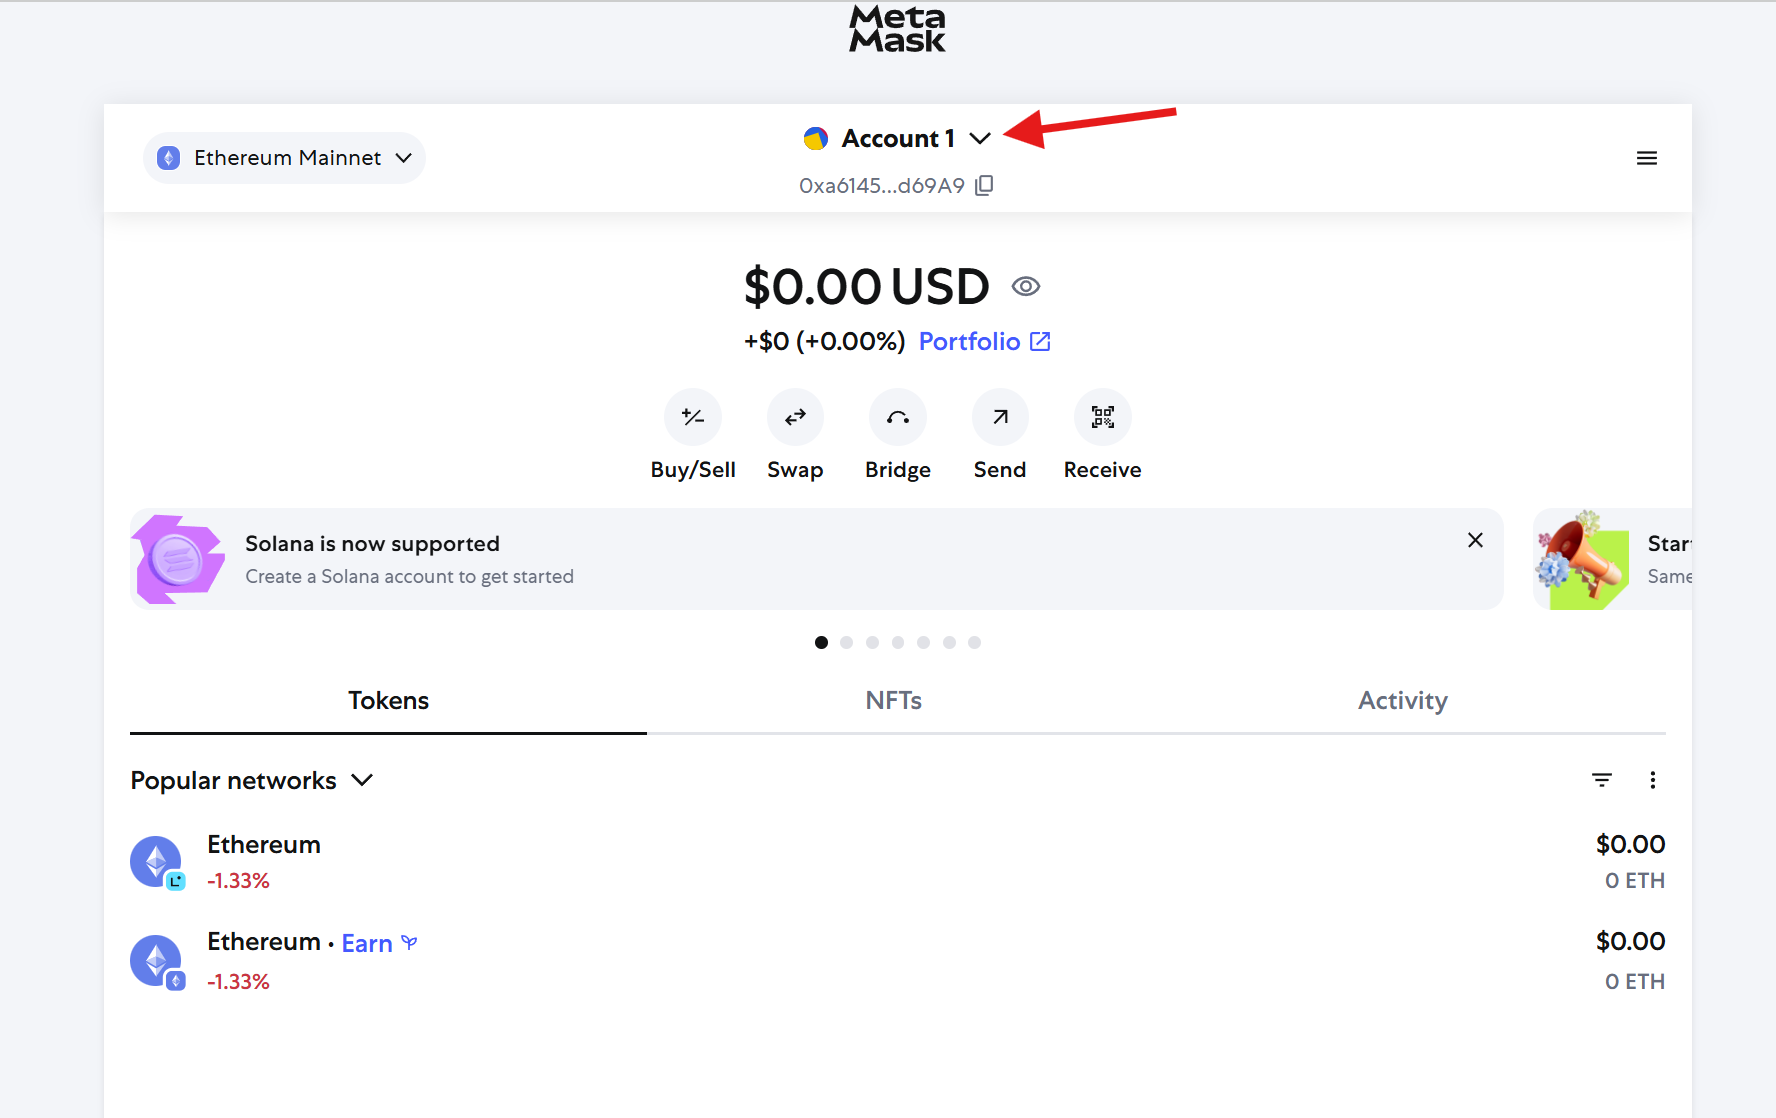
- Your Metamask wallet is now created. Click the dropdown above wallet address.
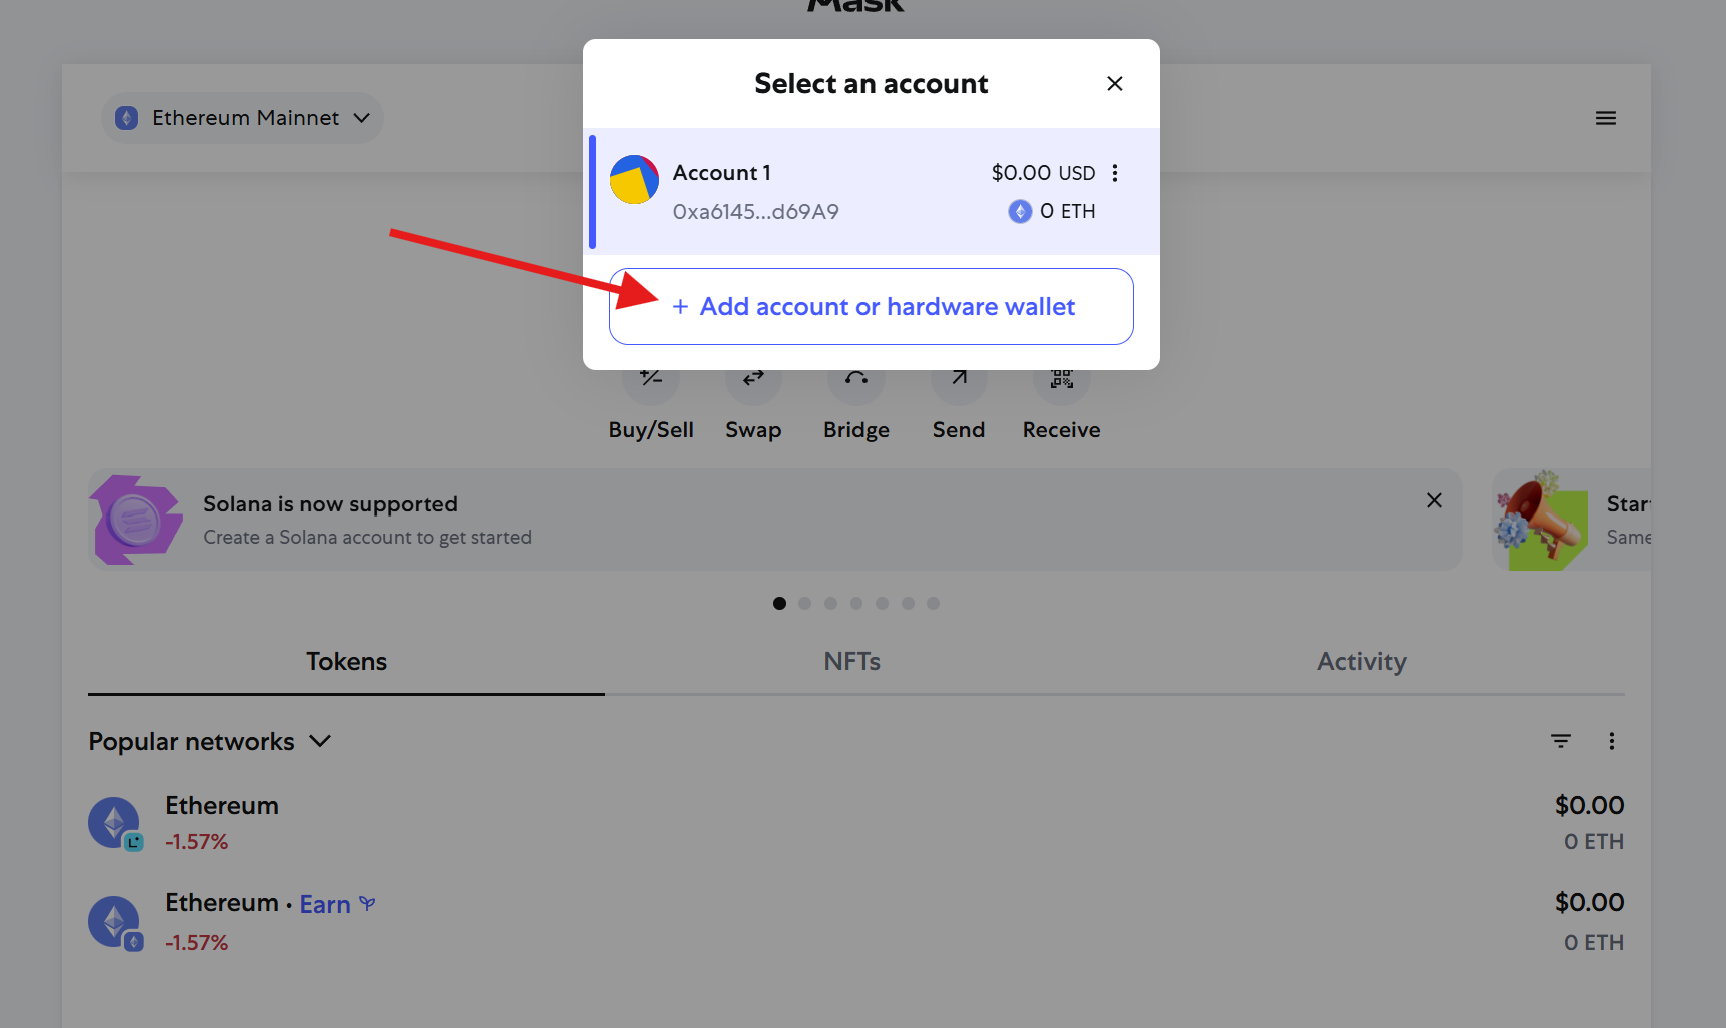
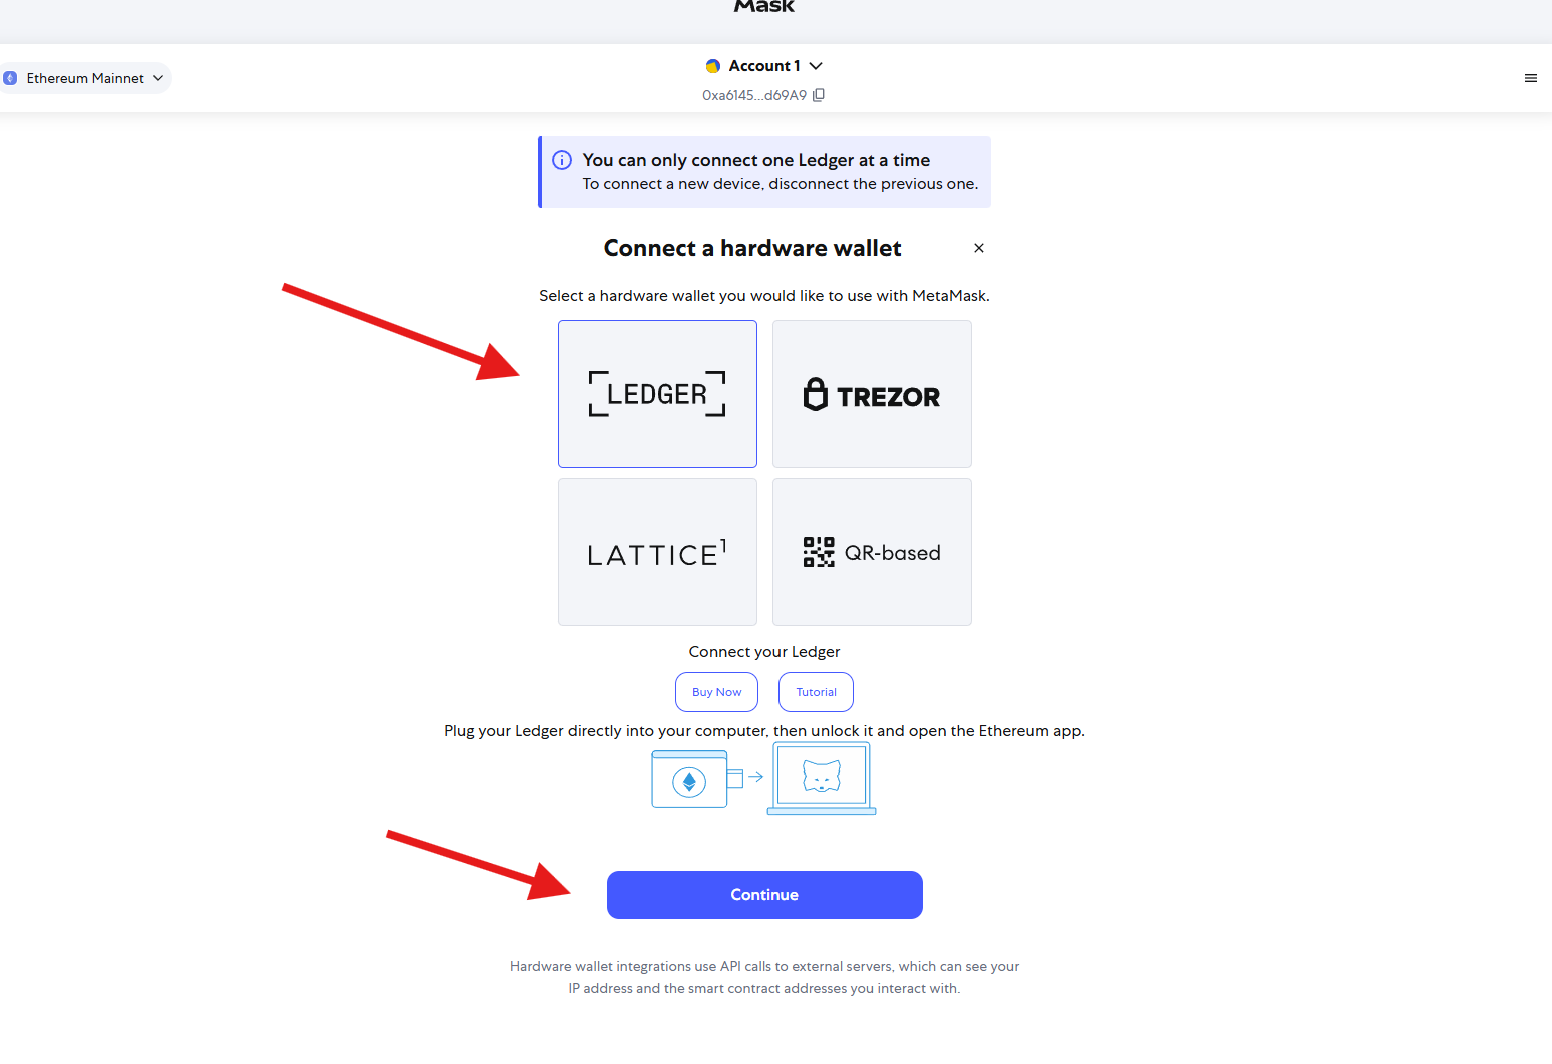
- Select “Add account or hardware wallet”, then choose “Hardware wallet”.

- On the next screen, select “Ledger” and click “Continue”.
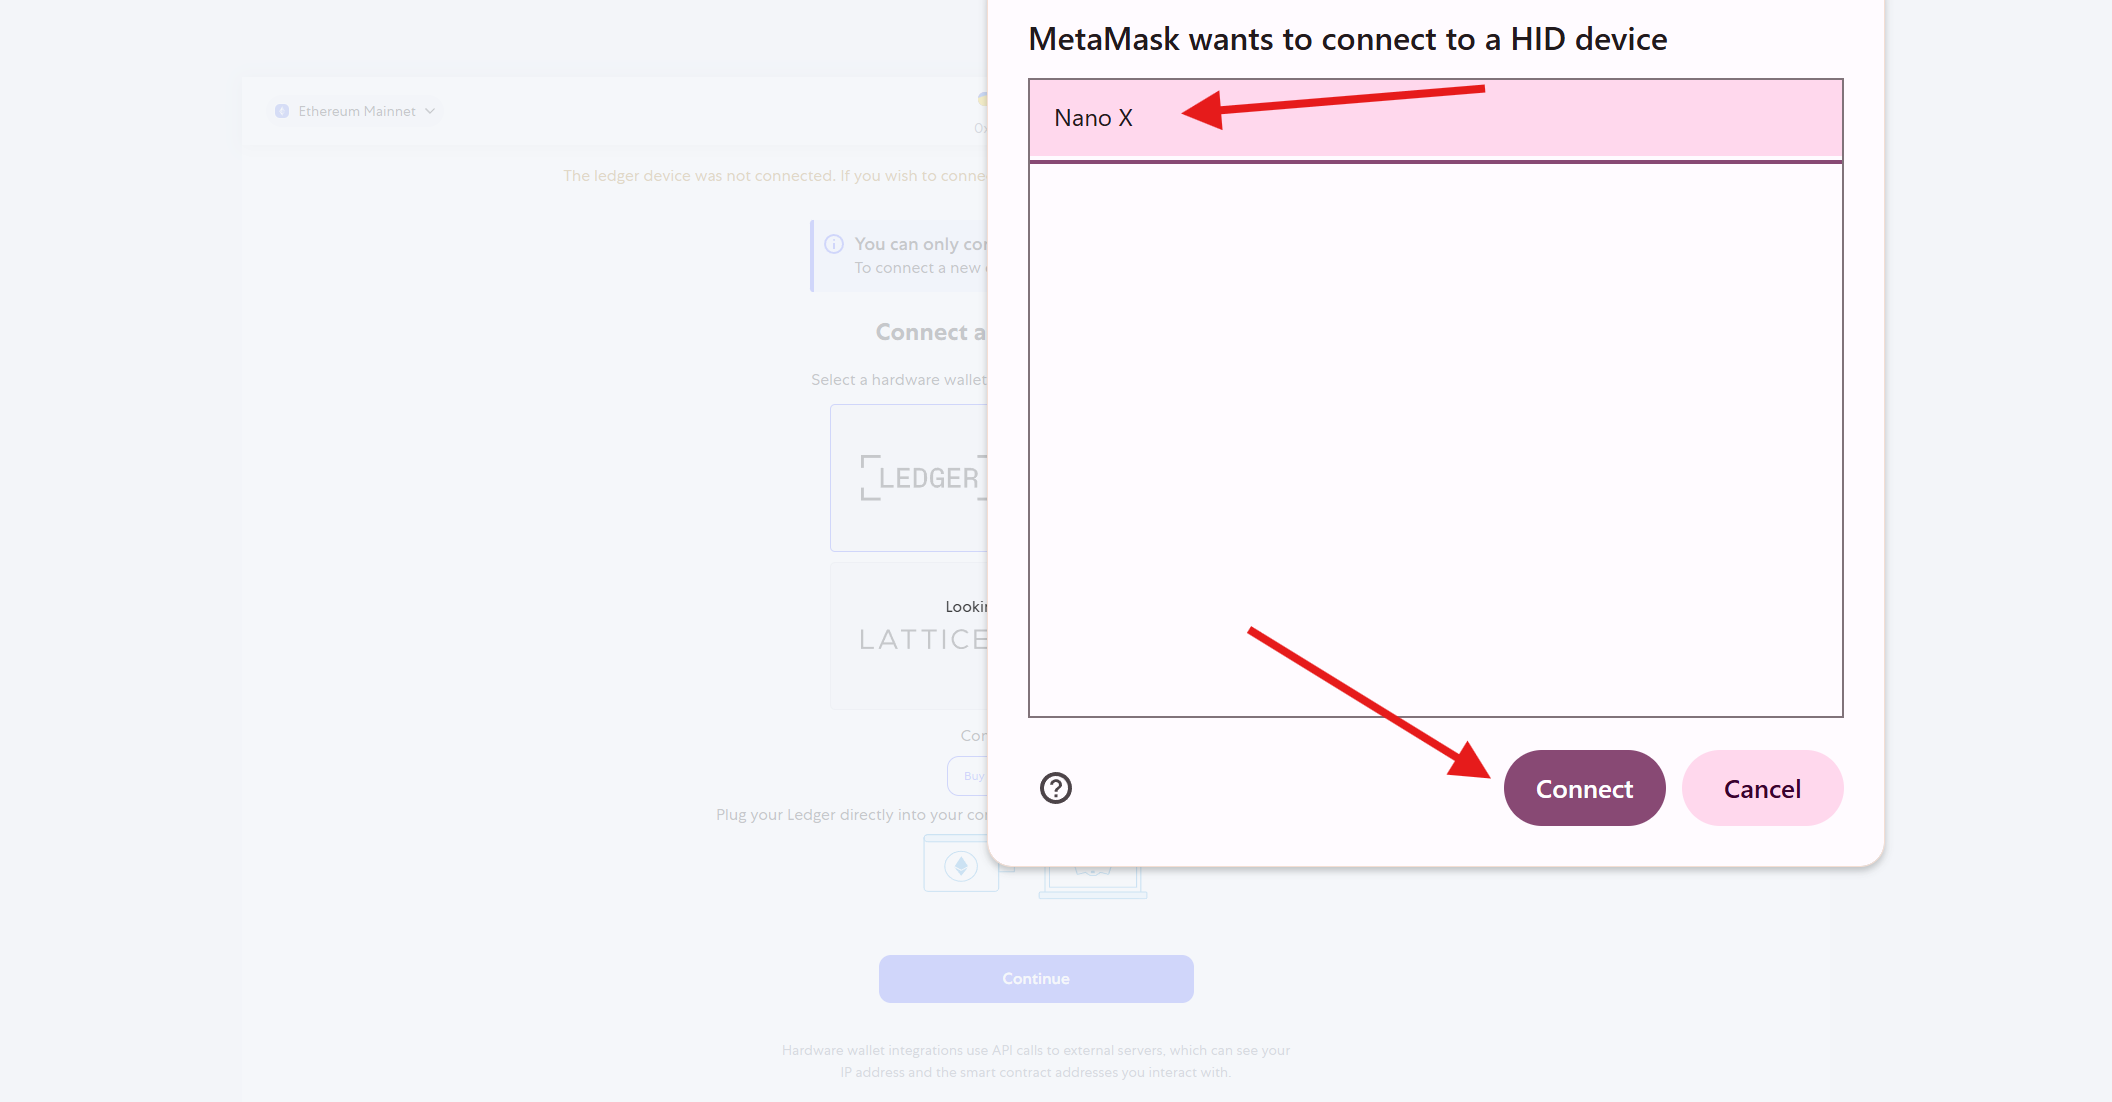
- Click on device name and confirm by clicking “Connect” again.
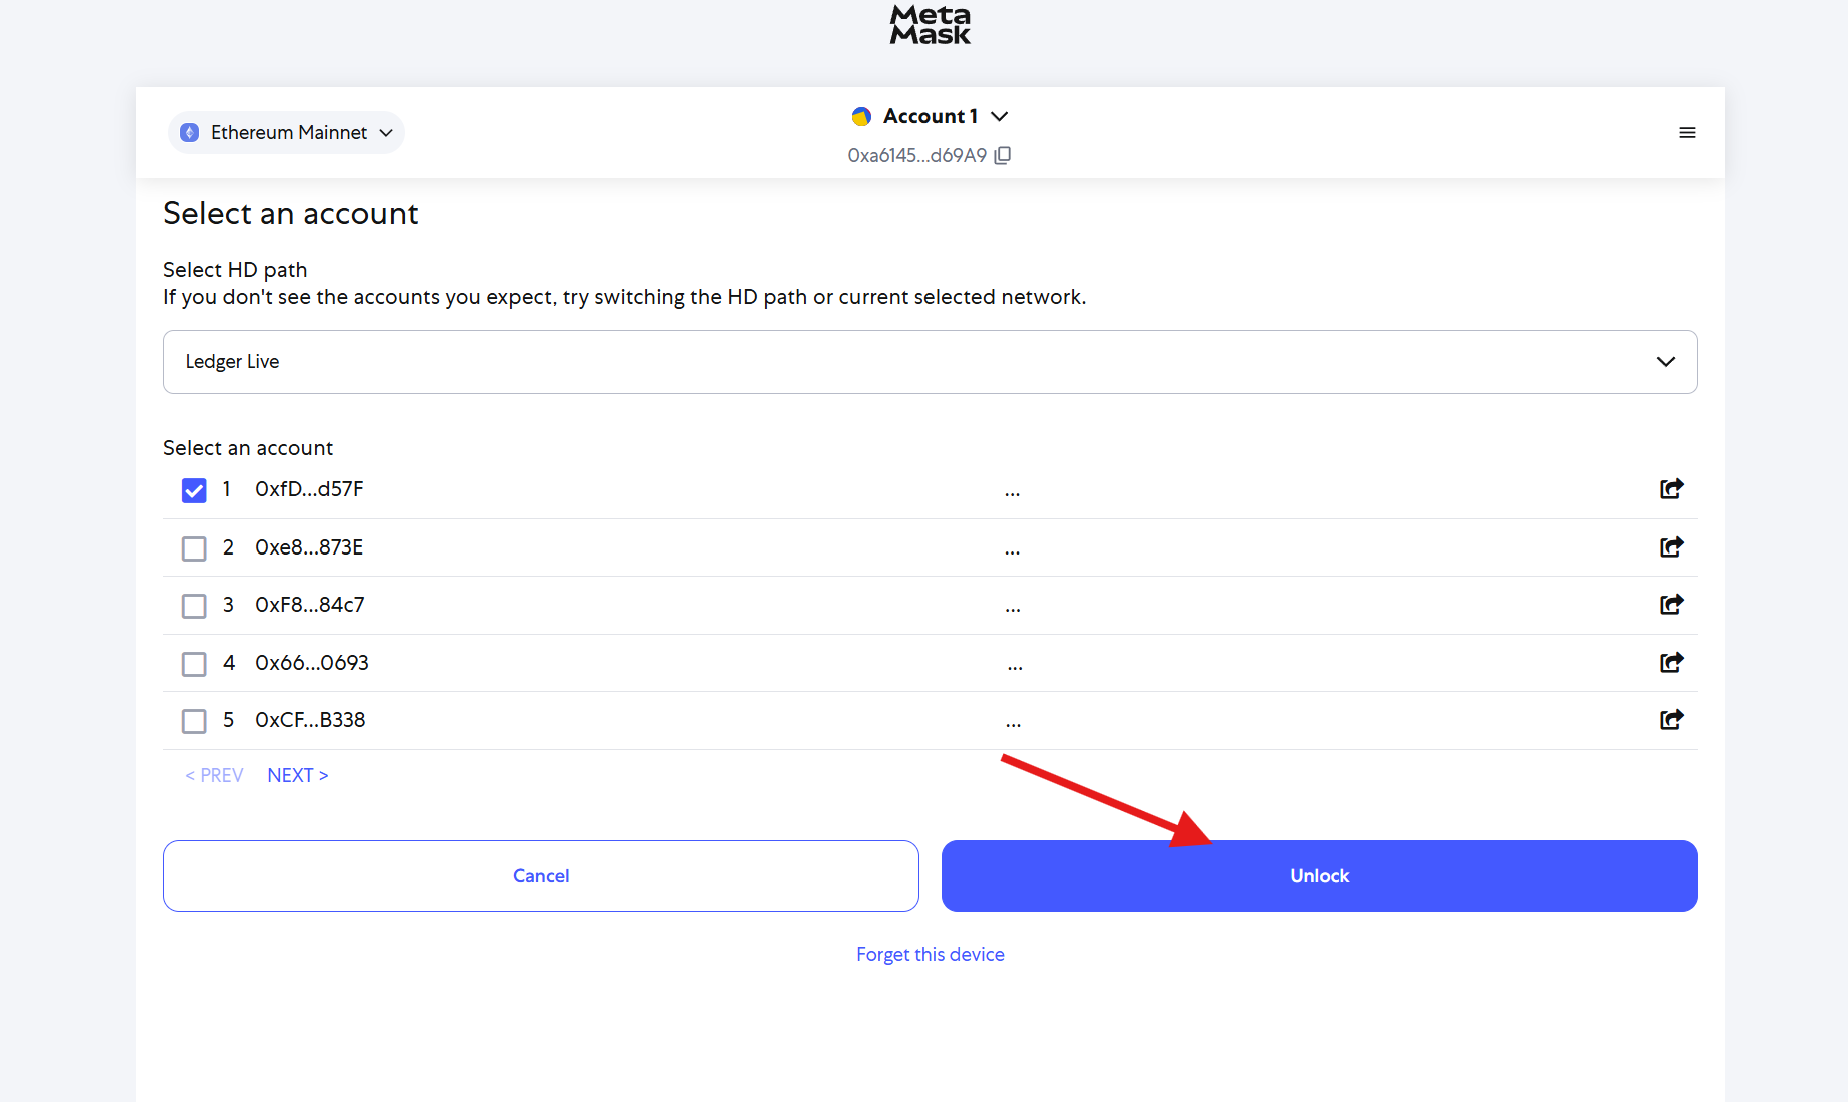
- Choose the address you wish to use from your Ledger and click “Unlock”.
Add Zilliqa Network to Metamask Wallet
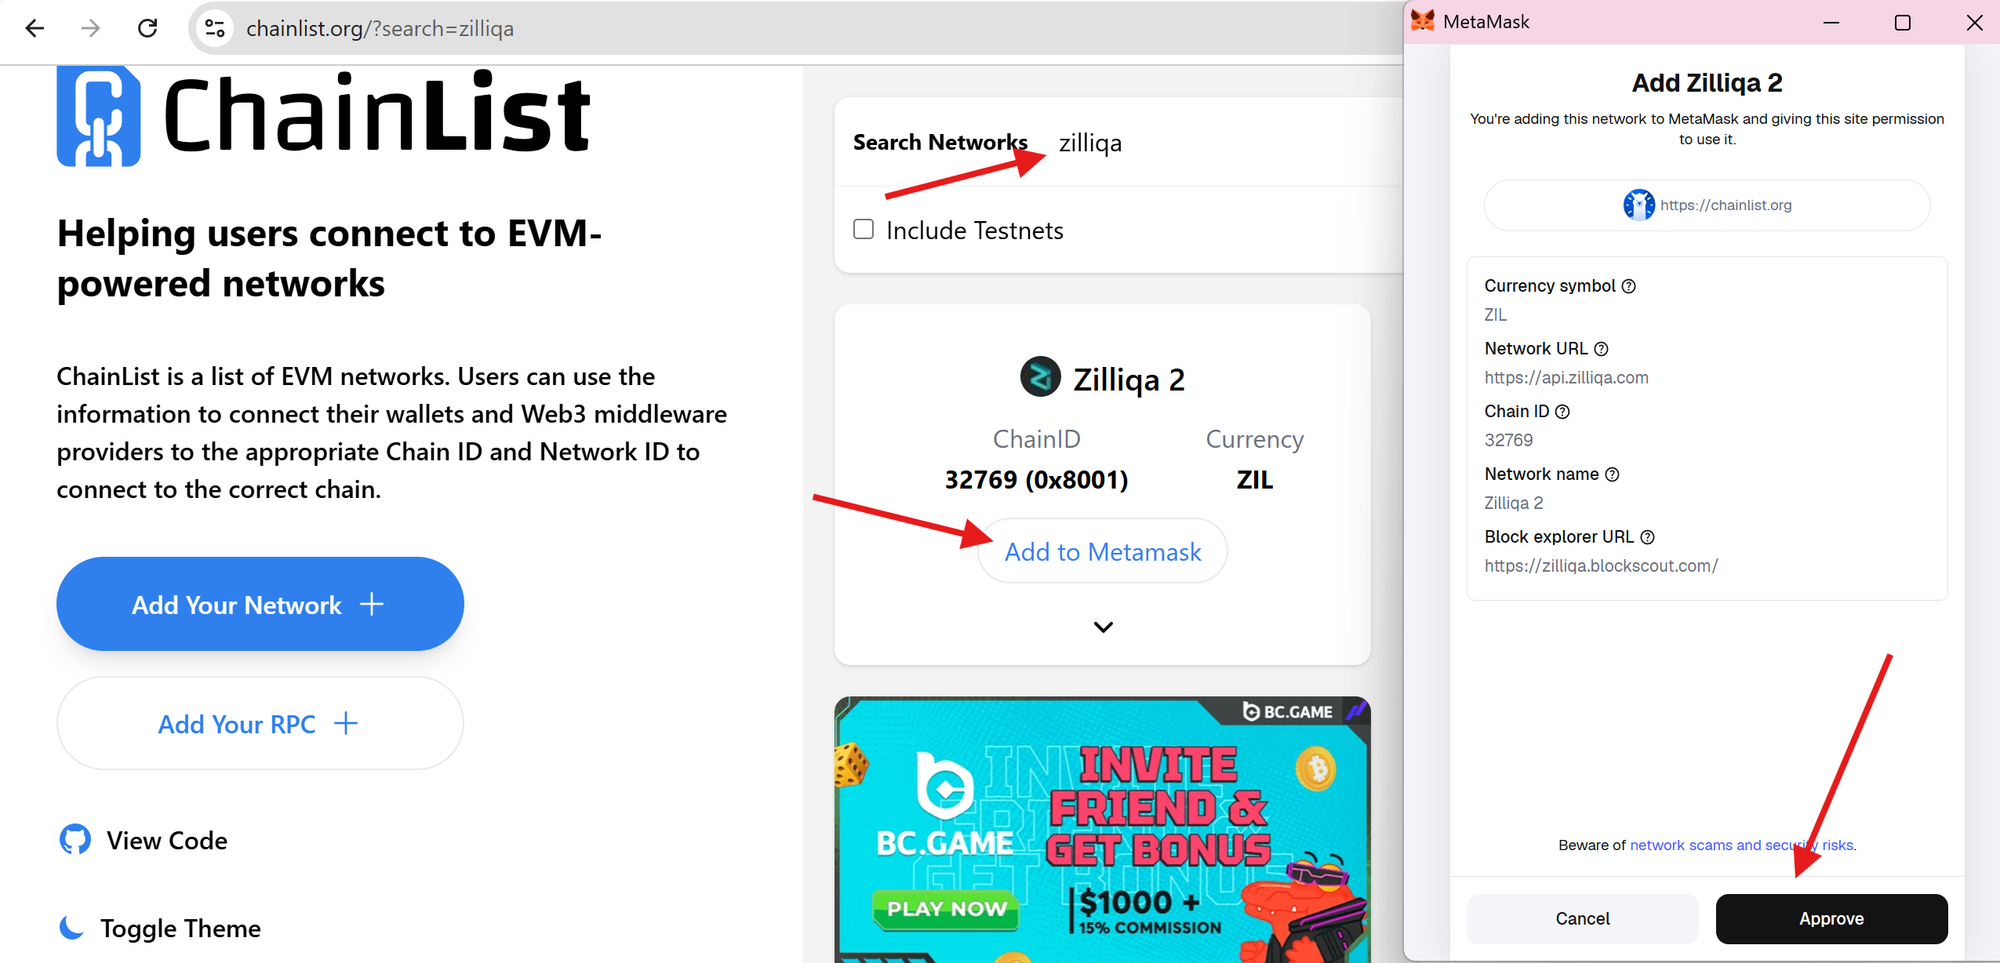
• Visit https://chainlist.org, and In the search bar, type "Zilliqa".
• Click the "Add to Metamask". When prompted by Metamask, click "Approve" to add the network.
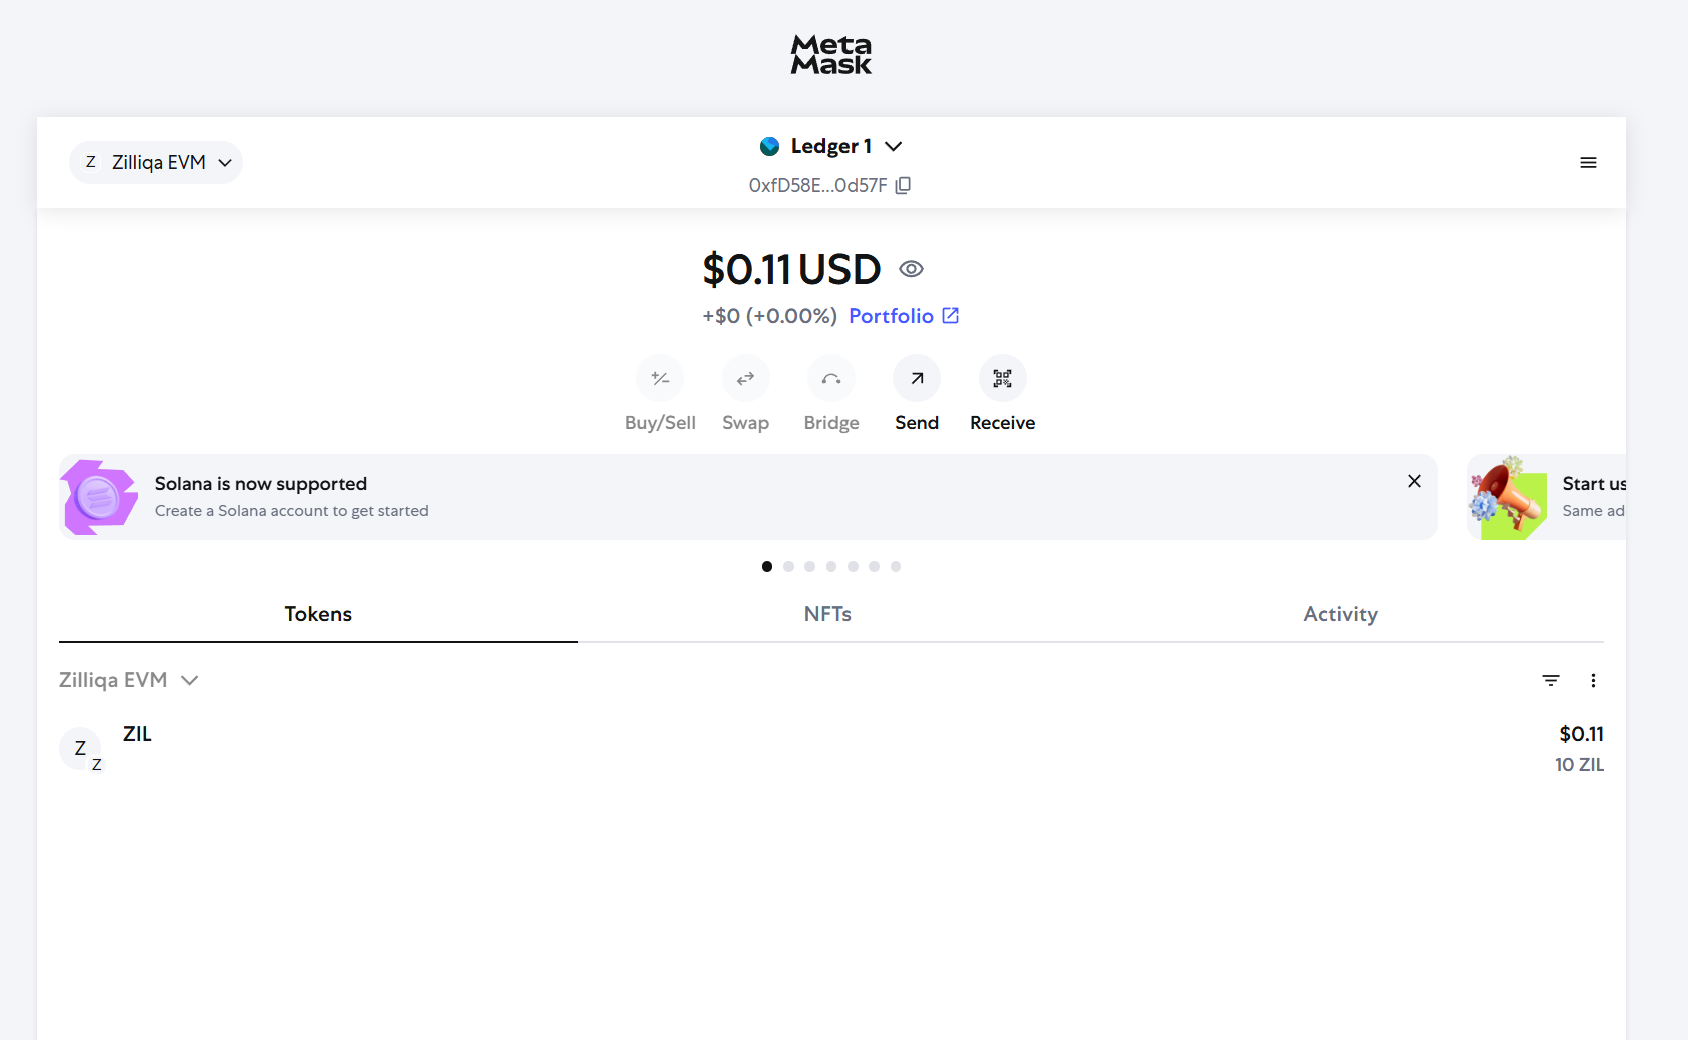
- Congratulations, Your Ledger is now successfully connected to Metamask and you have also added Zilliqa EVM network.