A Guide to Zilliqa Ledger Nano S app
We share with you a simple guide on how to use the Zilliqa Ledger Nano S app.
Hello all, the long awaited Zilliqa Ledger Nano S app is finally here! We are looking forward to HODL-ing $ZIL safely and securely with you, as we journey towards the rapid adoption of the Zilliqa platform.
We share with you a simple guide on how to use the Zilliqa Ledger Nano S app.
Step 1: Installing the Ledger Nano S app
- Download Ledger Live on your computer using the link below: https://shop.ledger.com/pages/ledger-live;
- Navigate to the
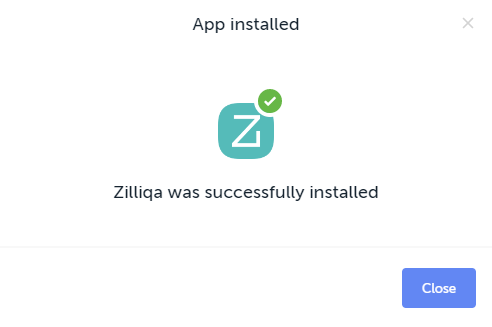
Managertab within the Ledger Live app and confirm the access to your Ledger on your hardware wallet; - Search for Zilliqa in the application store search bar, and download the Zilliqa Ledger Nano S app by clicking download.
- You have successfully installed the Zilliqa Ledger Nano S application! 🎉
Step 2: Accessing your wallet via Ledger Nano S
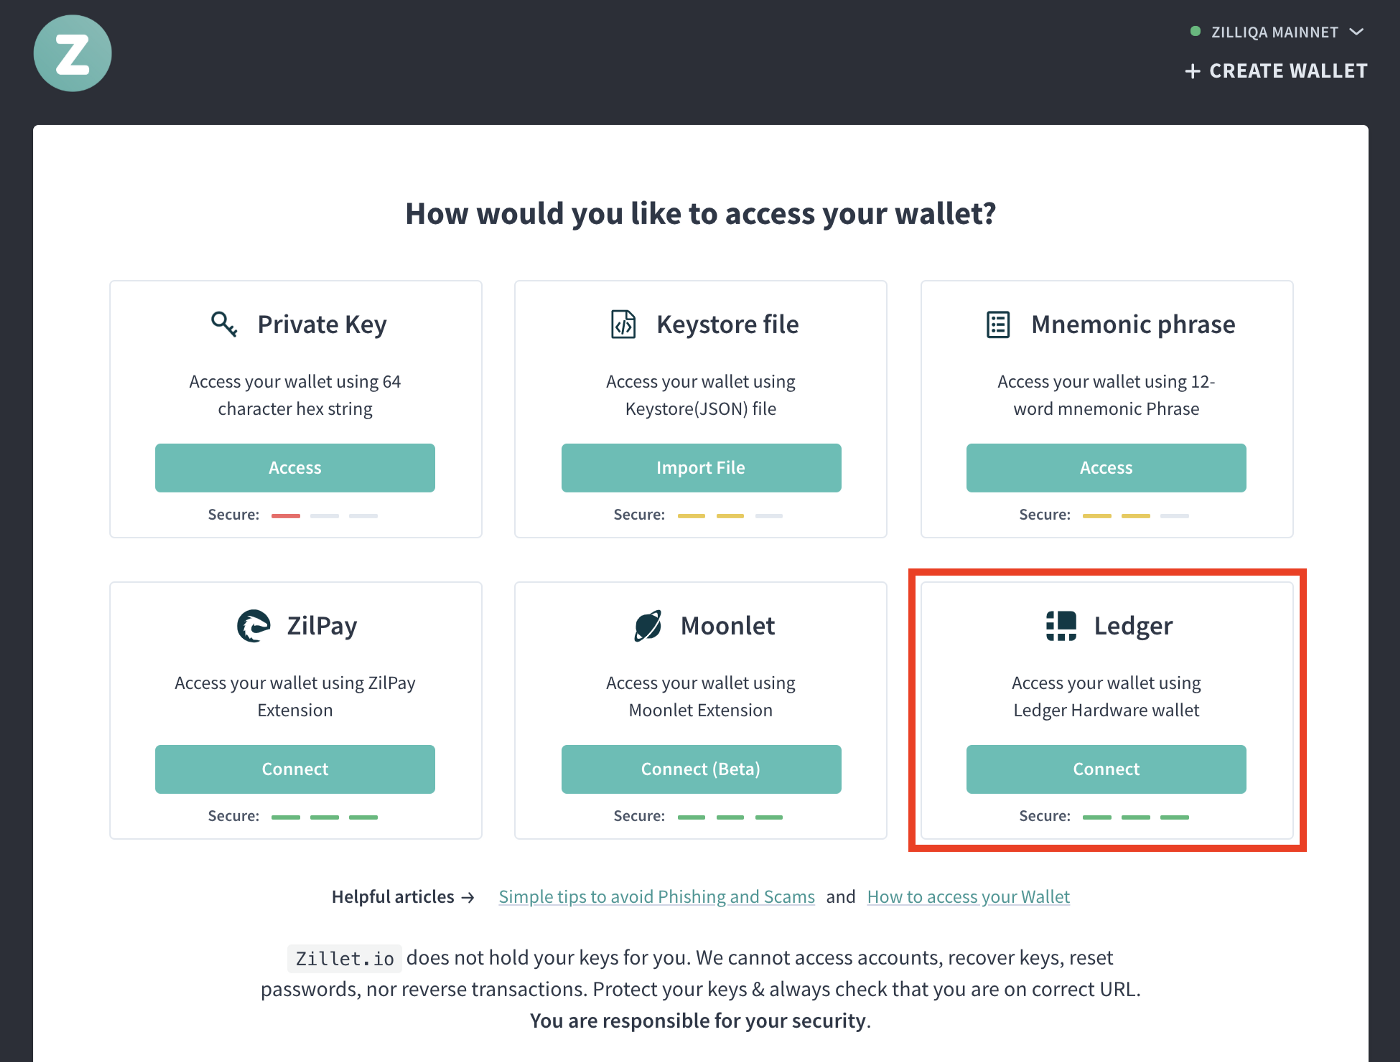
- Now, navigate to https://zillet.io/ (A web-based Zilliqa wallet) on your Google Chrome web browser;
- Select Ledger as the preferred option to
Connectand access your wallet on Zillet wallet;
- Select which index key you want to use (default index key is
#0) and confirm the use of that index key on your Ledger Nano S device by simultaneously clicking both the left and right buttons. For key index #1 or more, click the Next Account button;
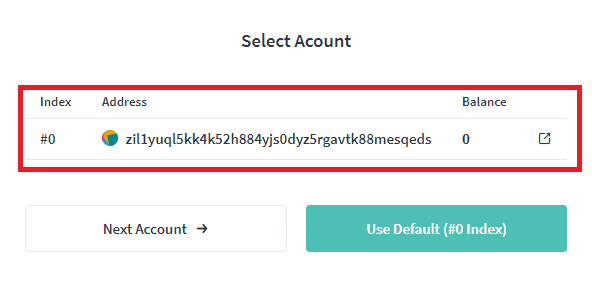
- Now you have access to your wallet account on Zillet via Ledger! 🎉
Step 3: Sending a transaction on Zillet via Ledger Nano S
- Input the
Recipient Addressand theAmountyou wish to send, then click onSend Transaction;
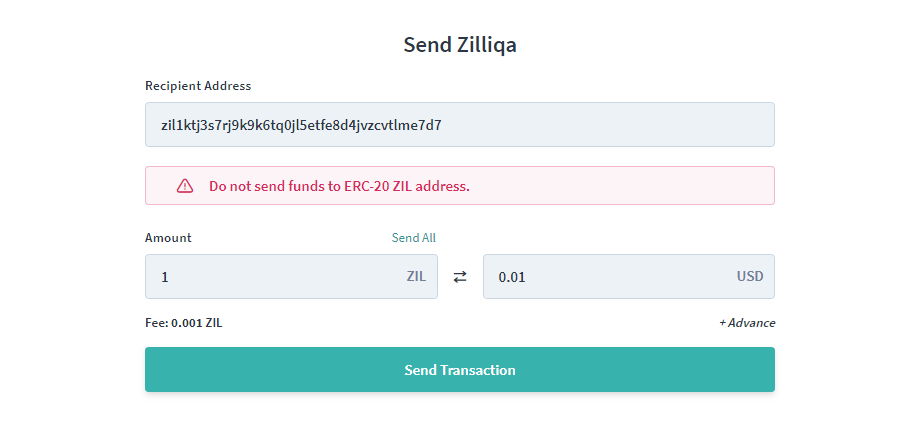
- Confirm the details of the transaction on your Ledger device. Check if the recipient address and amount displayed on the Ledger are exactly the same as what you keyed in as per the previous step;

- Authorize the transaction by clicking both the left and right buttons simultaneously on your Ledger device if the transaction details match;
- Now that your transaction to the Zilliqa main-net has been authorized and broadcasted, simply wait for the transaction to be included in the next block and it will be confirmed; 🎉
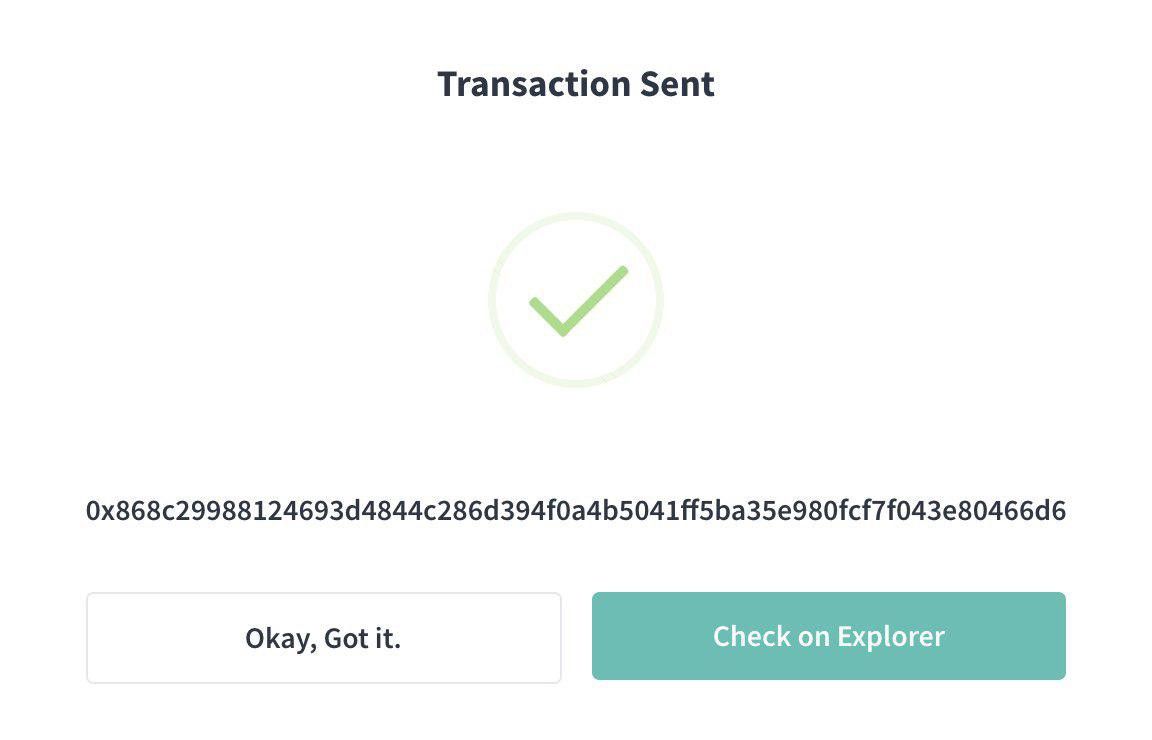
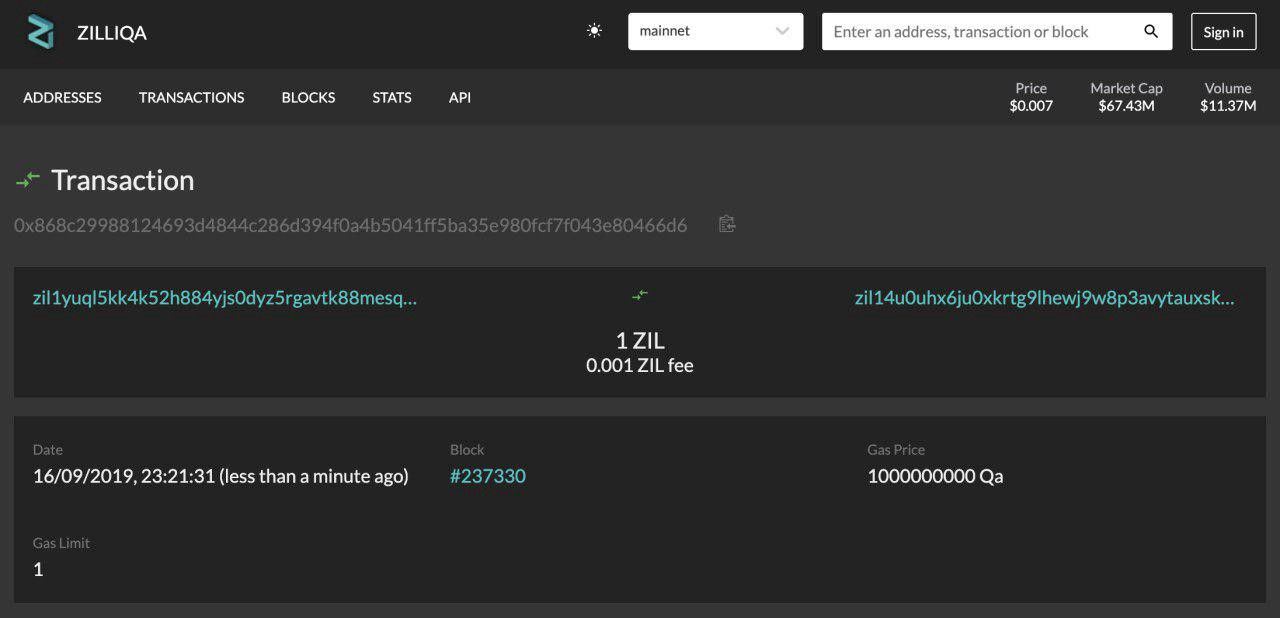
- Navigate to the explorer viewblock.io to check the status of your transaction!
That’s all folks! Stay strong and keep HODL-ing.
If you have any questions that require assistance, please contact the Zilliqa Research team in the following channels for support: